This post may contain affiliate links. Please read our privacy policy.
If there is one recipe that I remember from my Nana, it is her cheesecake. Although this is not your typical cheesecake, it was cheesecake to me and our entire family, and we all swooned when she made it.
Essentially her recipe was a shortbread crust, a cream cheese and confectioners’ sugar filling, a layer of canned pie filling, then cool whip to top it all off. Her canned topping choice varied on her mood, but was usually cherry or lemon, sometimes she slathered on blueberry or strawberry just to keep us on our toes.
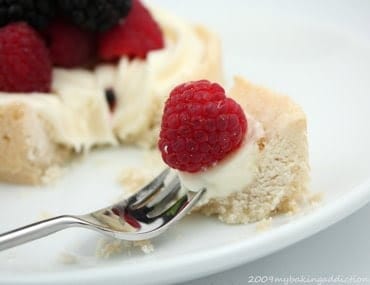
I decided to modernize her cheesecake by making it into individual servings, using fresh seasonal fruit instead of the canned pie filling and switching up the crust recipe. Now that I consider myself somewhat of a baker, I realize that Nana’s filling is basically cream cheese frosting, but it’s still delicious nonetheless. I will definitely get around to posting the original recipe at some point this summer, but I wanted share this one with you first!
Thanks for stopping by and have a delectable day!!

Nana’s Cheesecake Gone Modern

Ingredients:
For the Crust
1 3/4 cups all-purpose flour
2/3 cup confectioners’ sugar
1/4 cup cornstarch
3/4 teaspoon salt
12 tablespoons unsalted butter — (1 1/2 sticks) at very cool room temperature, cut into1-inch pieces
For the Filling
16 ounces of cream cheese; softened to room temperature
1 1/2 cup confectioners’ sugar
1 teaspoon vanilla extract (I used clear extract)
Directions:
For the Crust
1. Spray (4) 4 inch springform pans with nonstick cooking spray.
2. Pulse flour, confectioners’ sugar, cornstarch, and salt in food processor workbowl fitted with steel blade. Add butter and process to blend, 8 to 10 seconds, then pulse until mixture is pale yellow and resembles coarse meal, about three 1-second bursts. (To do this by hand, mix flour, confectioners’ sugar, cornstarch, and salt in medium bowl. Freeze butter and grate it on large holes of box grater into flour mixture. Toss butter pieces to coat. Rub pieces between your fingers for a minute, until flour turns pale yellow and coarse.) Sprinkle mixture into pans and press firmly with fingers into even, 1/4-inch layer over entire pan bottom and about 1 inch up sides.
3. Refrigerate for 30 minutes.
4. Adjust oven rack to middle position and heat oven to 350°F.
5. Bake about 15 minutes.
For the Filling
1. Beat the cream cheese until smooth and creamy.
2. Gradually add in the confectioners’ sugar and mix until smooth, blend in the vanilla extract; mixing well.
To Assemble
1. Pipe or spread the filling into the cooled crusts and top with fresh fruit of your choice.
Follow Jamie on Instagram. We love to see what you're baking from MBA! Be sure to tag @jamiemba and use the hashtag #mbarecipes!
[pinit]


Gorgeous!!
This looks so delicious! I love your blog and all your yummy creations!
Far too gorgeous Jamie. The pictures, the idea & the recipe…all outstandingly beautiful! Your blog is beautiful & gresh!
simple and yummy
i LOVE recipes like this- those that bring back family memories :) Great cheesecake!!!
this is great and so neat for you to connect it to your memories!
This dessert looks just gorgeous. ALMOST too good to eat ;)
Great recipe! Best part besides being (I'm sure) delish is that's it's easy and almost no bake. I'm thinking I could do the crust in my toaster/convection oven!
~ingrid
MMMMM That looks delish! And the perfect portion too!
Every photo you take is gorgeous!! What a beautiful dessert and I am sure it is tasty too!