This post may contain affiliate links. Please read our privacy policy.
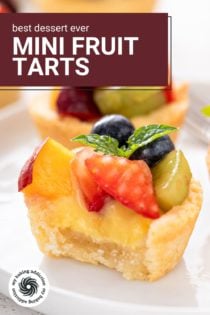
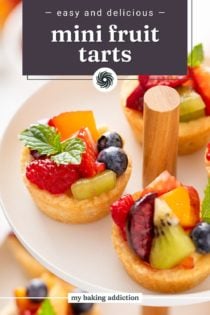
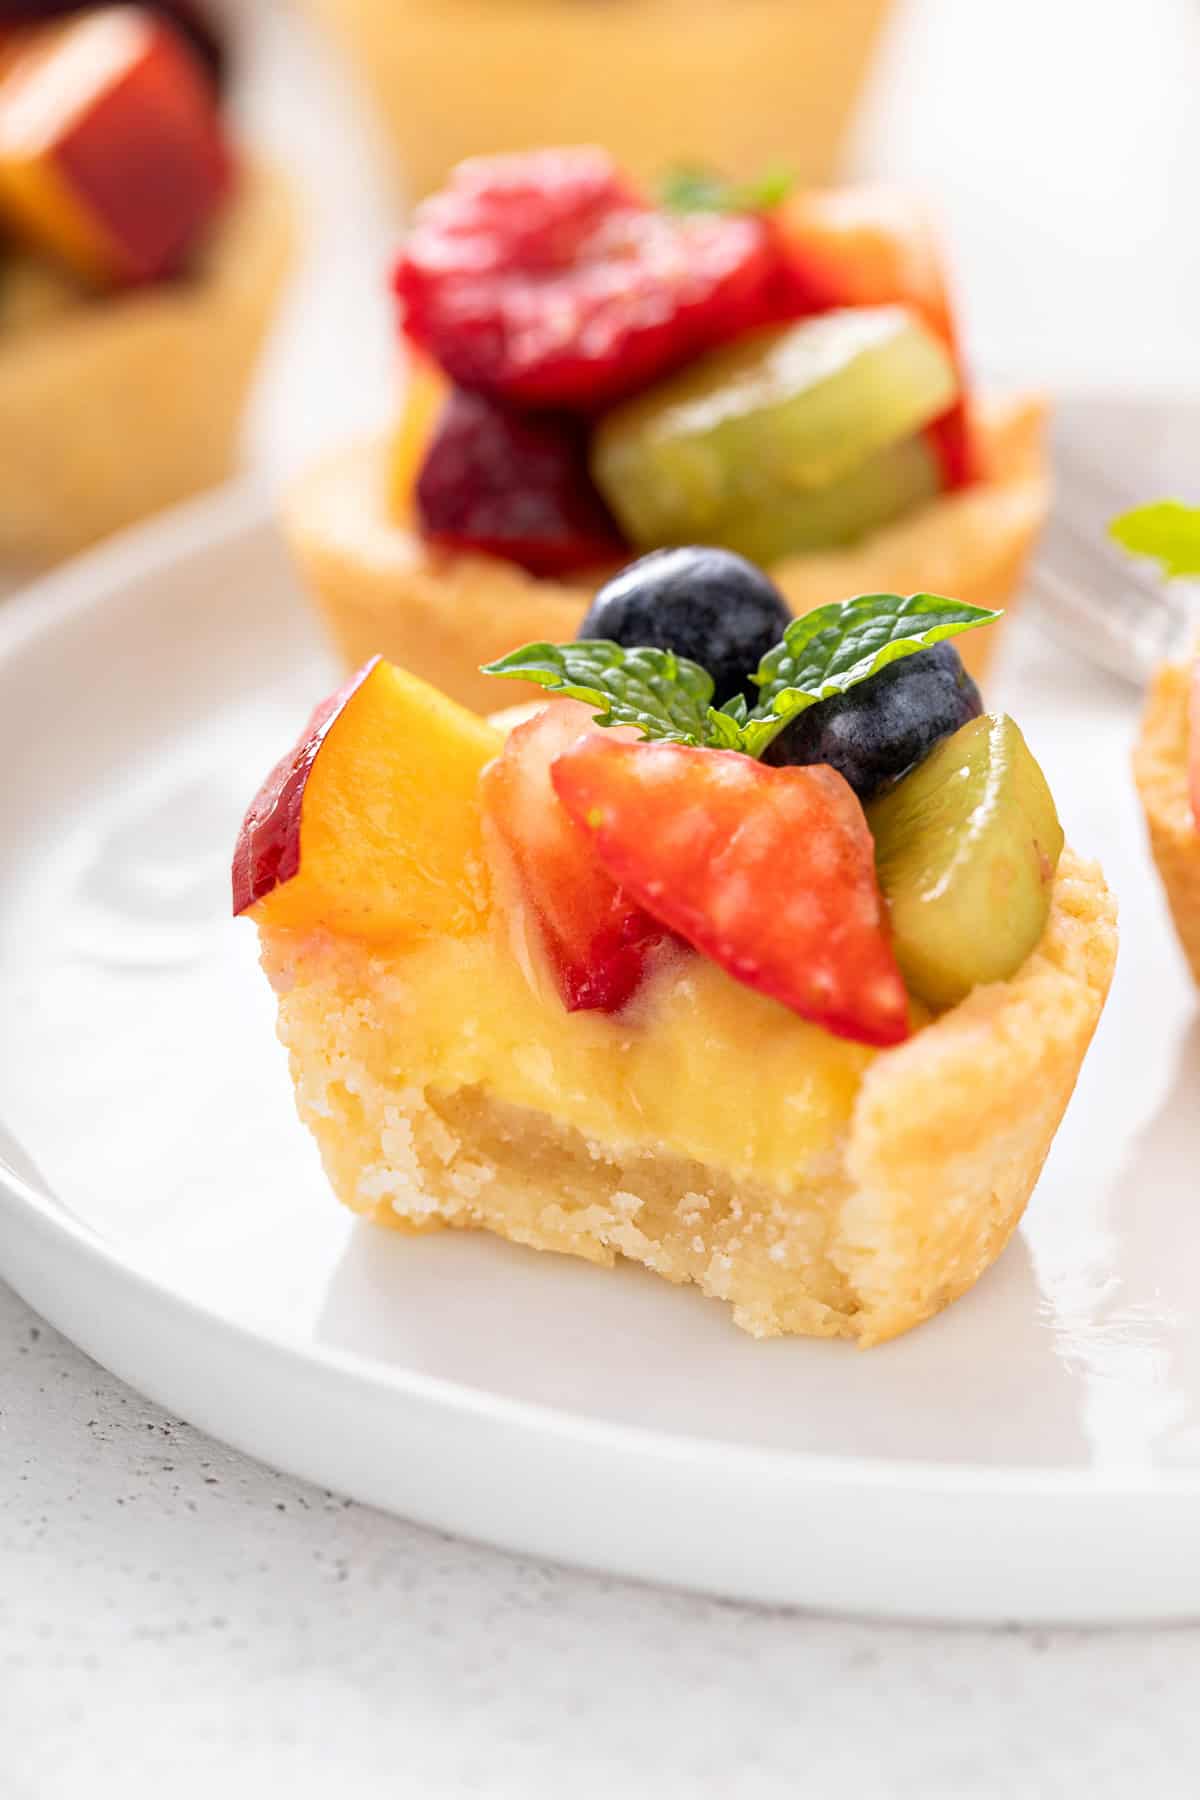
With a crisp tart shell, vanilla filling, and fresh fruit topping, these mini fruit tarts are as delicious as they are beautiful.

Long-time MBA readers know how much I love mini desserts. I have made all kinds of mini cheesecakes, mini bundt cakes, and even mini cinnamon rolls over the years.
And you definitely shouldn’t trust me around a batch of mini key lime pies.
These mini fruit tarts are my newest mini dessert love affair. With the buttery tart shell, luscious vanilla pudding, and bright, fresh fruit, they are a whole lot of goodness in a single bite (or two).
Since I made these during the summer I was able to use a whole variety of my favorite fruits, but I can’t wait to try a berry version, a tropical fruit version, and even a citrusy version during the winter months.
It’s like having multiple recipes all in one!
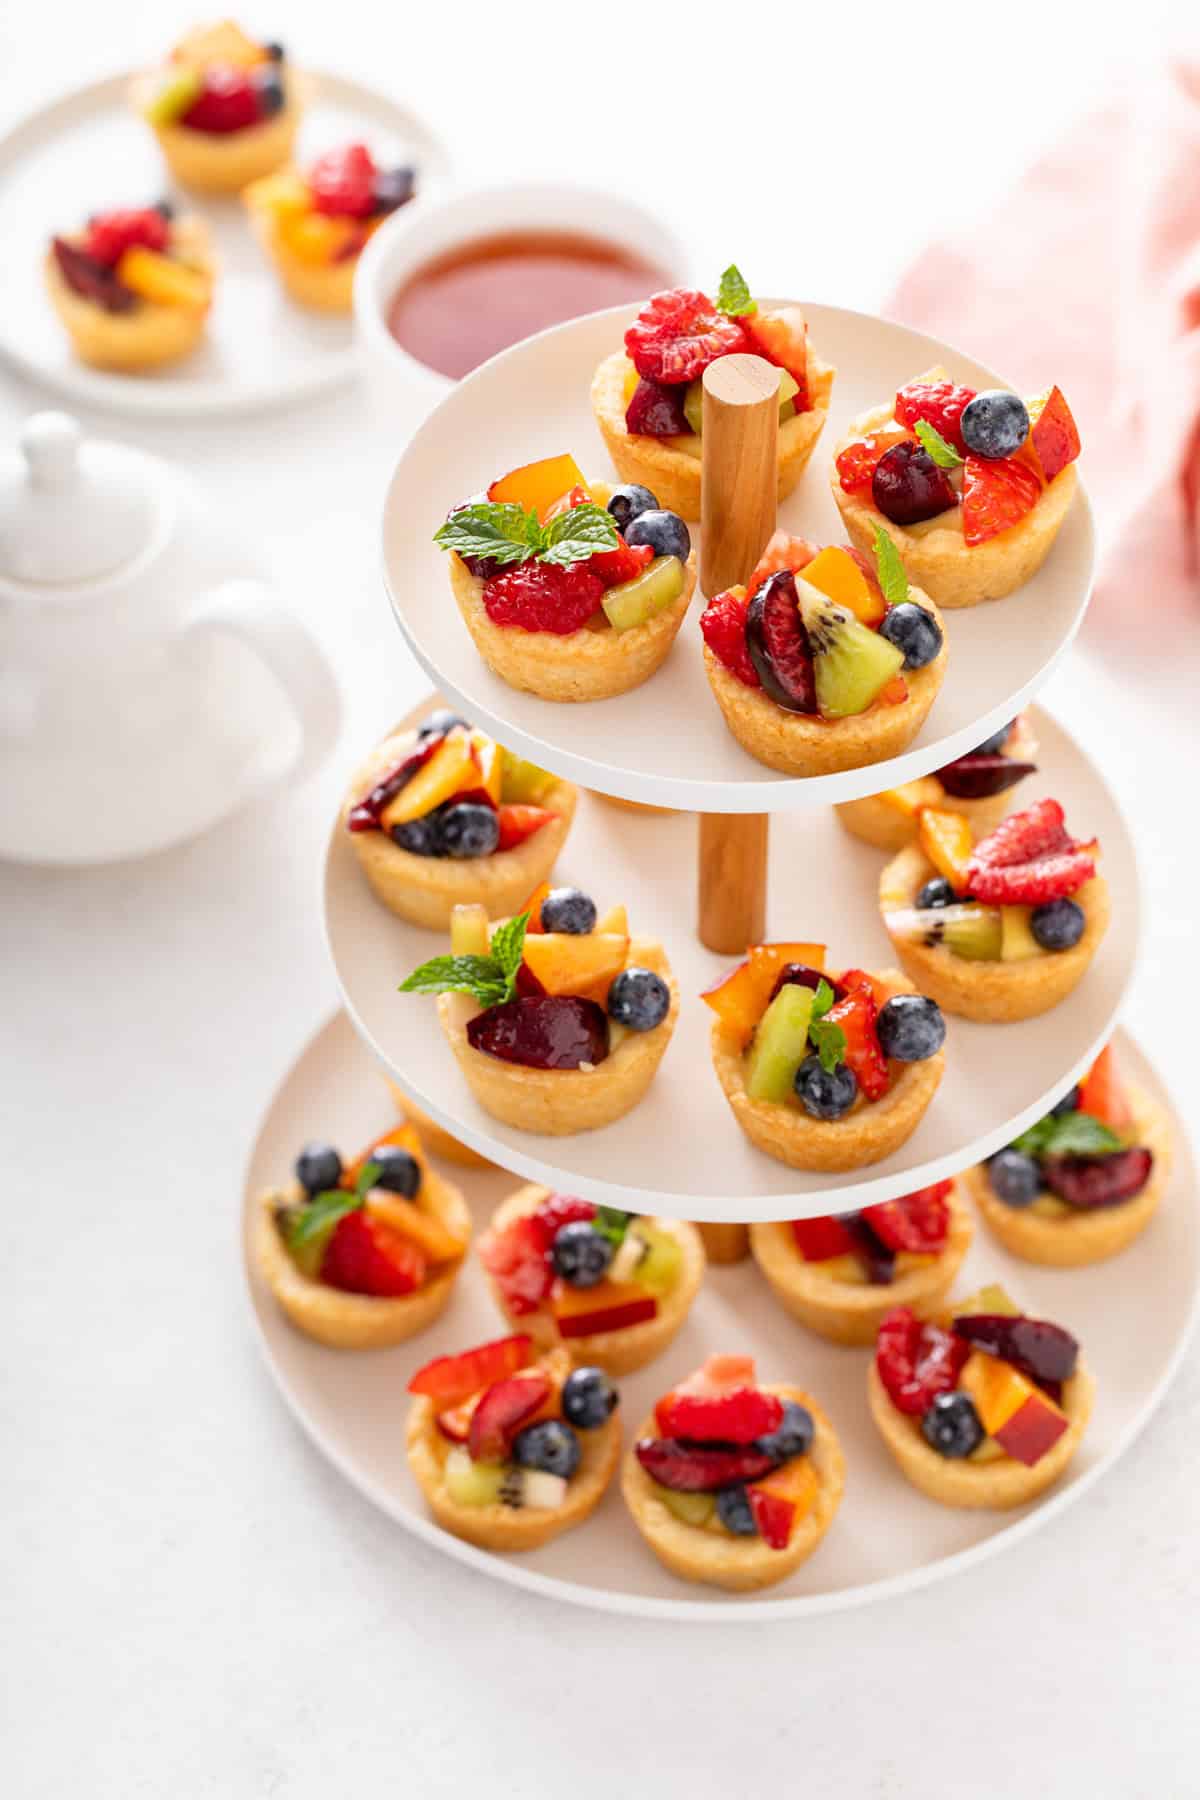
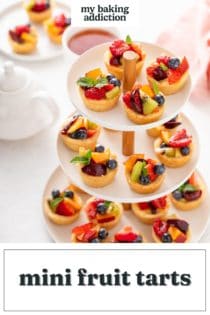
Beautiful and delicious mini fruit tarts
If you’re looking for a showstopper dessert, these mini fruit tarts are for you.
There are lots of times when a big dessert, like my strawberry tart or coconut cream pie, is the way to go. But other times, bite-size is what you want.
I make my mini fruit tarts in a mini muffin tin, so each one is just one or two bites. They’re perfect for setting out at cookouts, baby or bridal showers, or holiday parties when you want guests to be able to serve themselves and sample as many desserts as they like.
Imagine putting a platter of these next to mini pecan pies or mini pumpkin pies during the holidays! Your guests would be talking about them for ages.
Each mini fruit tart has a crisp homemade tart shell, a creamy vanilla pudding filling, and fresh fruit on top. And that might sound complicated, but I promise you they are surprisingly easy (and so fun!) to make.
How to make mini fruit tarts
Just by looking at how pretty these bite-size beauties are, you probably don’t believe me that they’re easy to make. But I’ll walk you through the whole process!
What you’ll need
There are three components to this recipe:
- Homemade tart shells
- Vanilla pudding filling
- Fresh fruit topping
For the tart dough, we adapted the dough from my friend Megan’s lemon tart recipe. You’ll need:
- 1 ½ cups all-purpose flour
- 4 tablespoons granulated sugar
- ½ teaspoon fine sea salt
- 12 tablespoons cold unsalted butter, cut into pieces
- 3 tablespoons milk
This will make enough dough for 18 mini tart shells.

As usual, make sure you are familiar with how to measure flour before you get started. You want to make sure your measurements are accurate so these tart shells come out perfect every time.
For the filling, I like to use my homemade vanilla pudding. It is easy and delicious and gets rave reviews from readers. Even if you’ve never made homemade pudding before, it’s worth giving it a try for these tarts.
For the topping, we’ll need about 2 cups of assorted fresh fruit. Some of my favorite fruits for these tarts include:
- Berries, such as strawberries, blueberries, raspberries, and blackberries
- Peaches
- Plums
- Cherries
- Kiwi
- Grapes
- Mango
How you prepare the fruits you are using will depend on their size. You can leave blueberries whole, but should halve or quarter fruits like raspberries, blackberries, grapes, and cherries.
Larger fruits, such as strawberries, kiwi, and peaches, can be cut into a small dice.
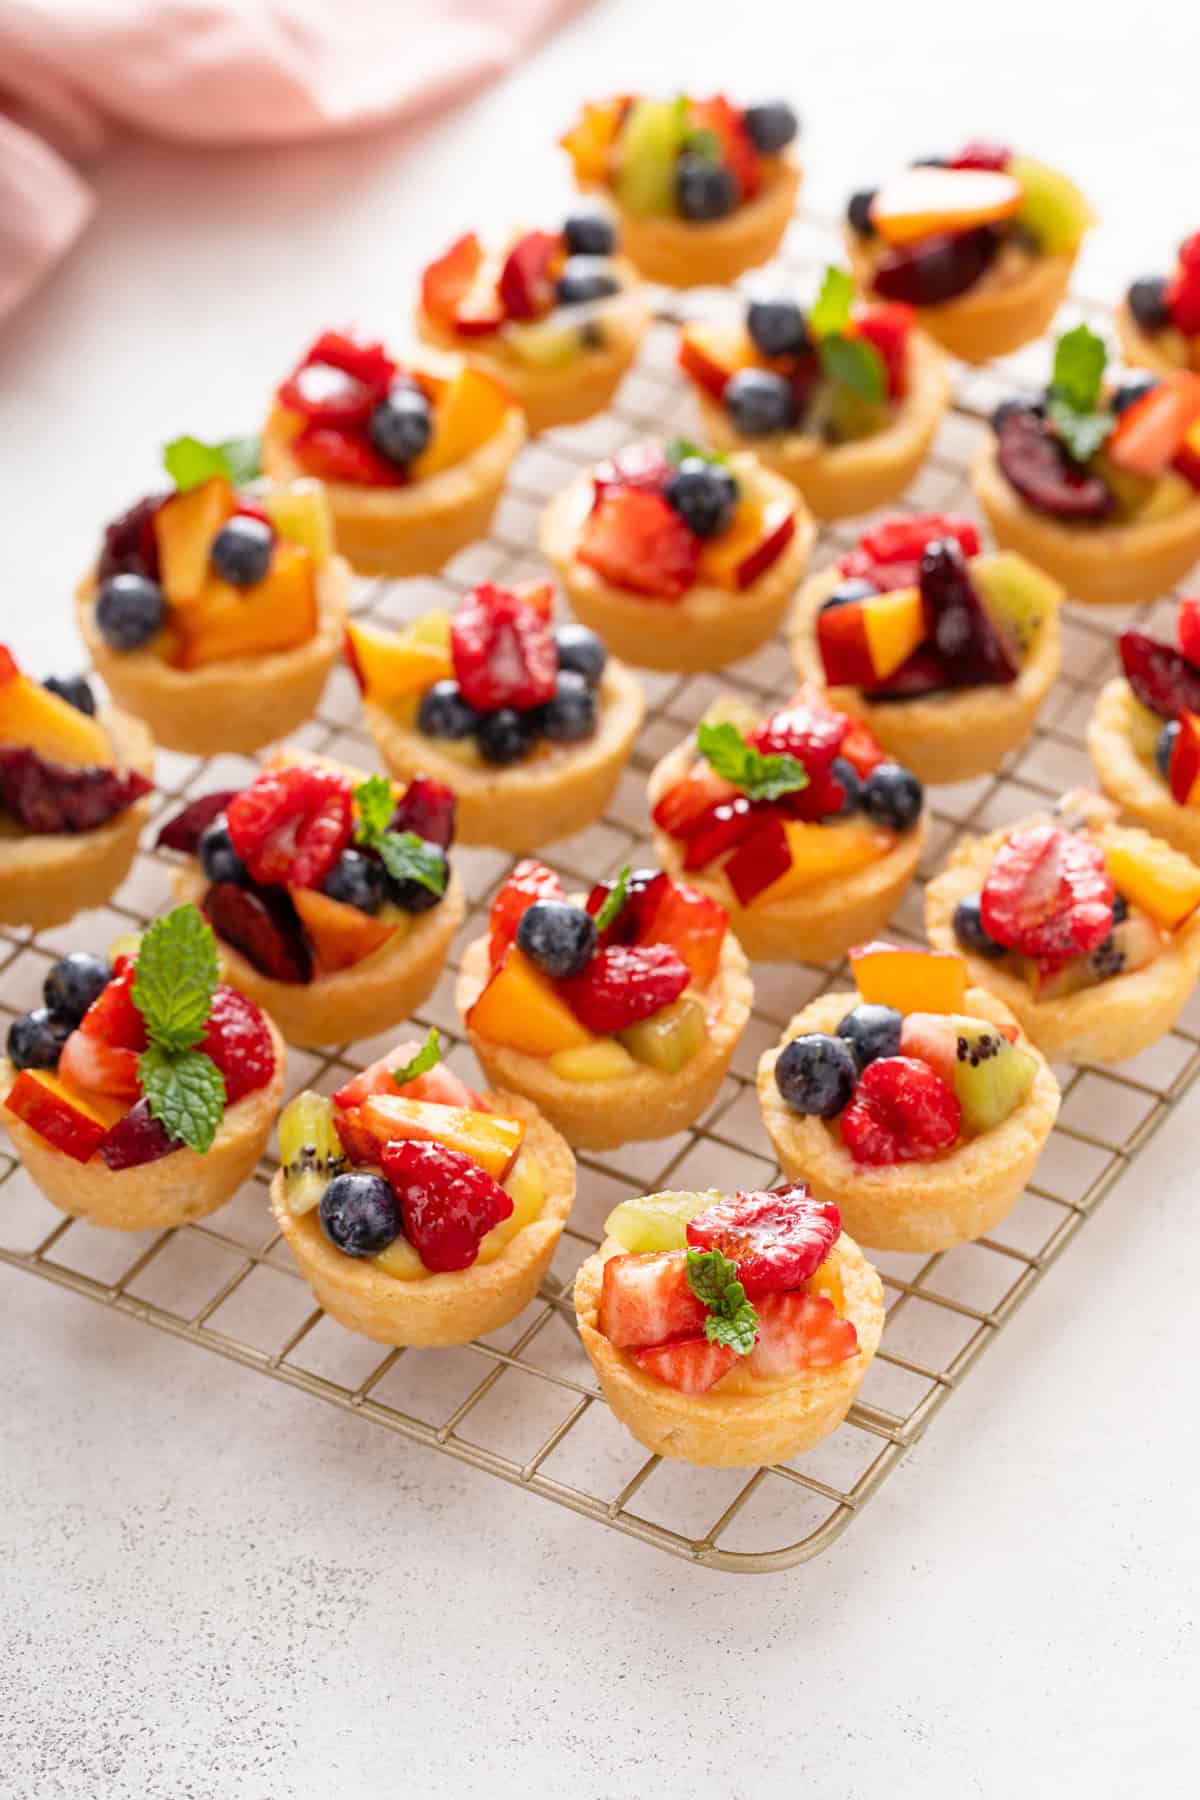
You can optionally glaze the tops of the tarts with a bit of apricot preserves. This will give the tops of the tarts a glossy look.
If you don’t want to do that step or you don’t have any apricot preserves on hand, feel free to skip it. The tarts will be just as delicious with or without it!
Making these mini fruit tarts
If you are nervous about making homemade pie crust, I promise you that making these tart shells is way easier. The dough doesn’t have to be rolled out and is way less finicky than regular pie dough!
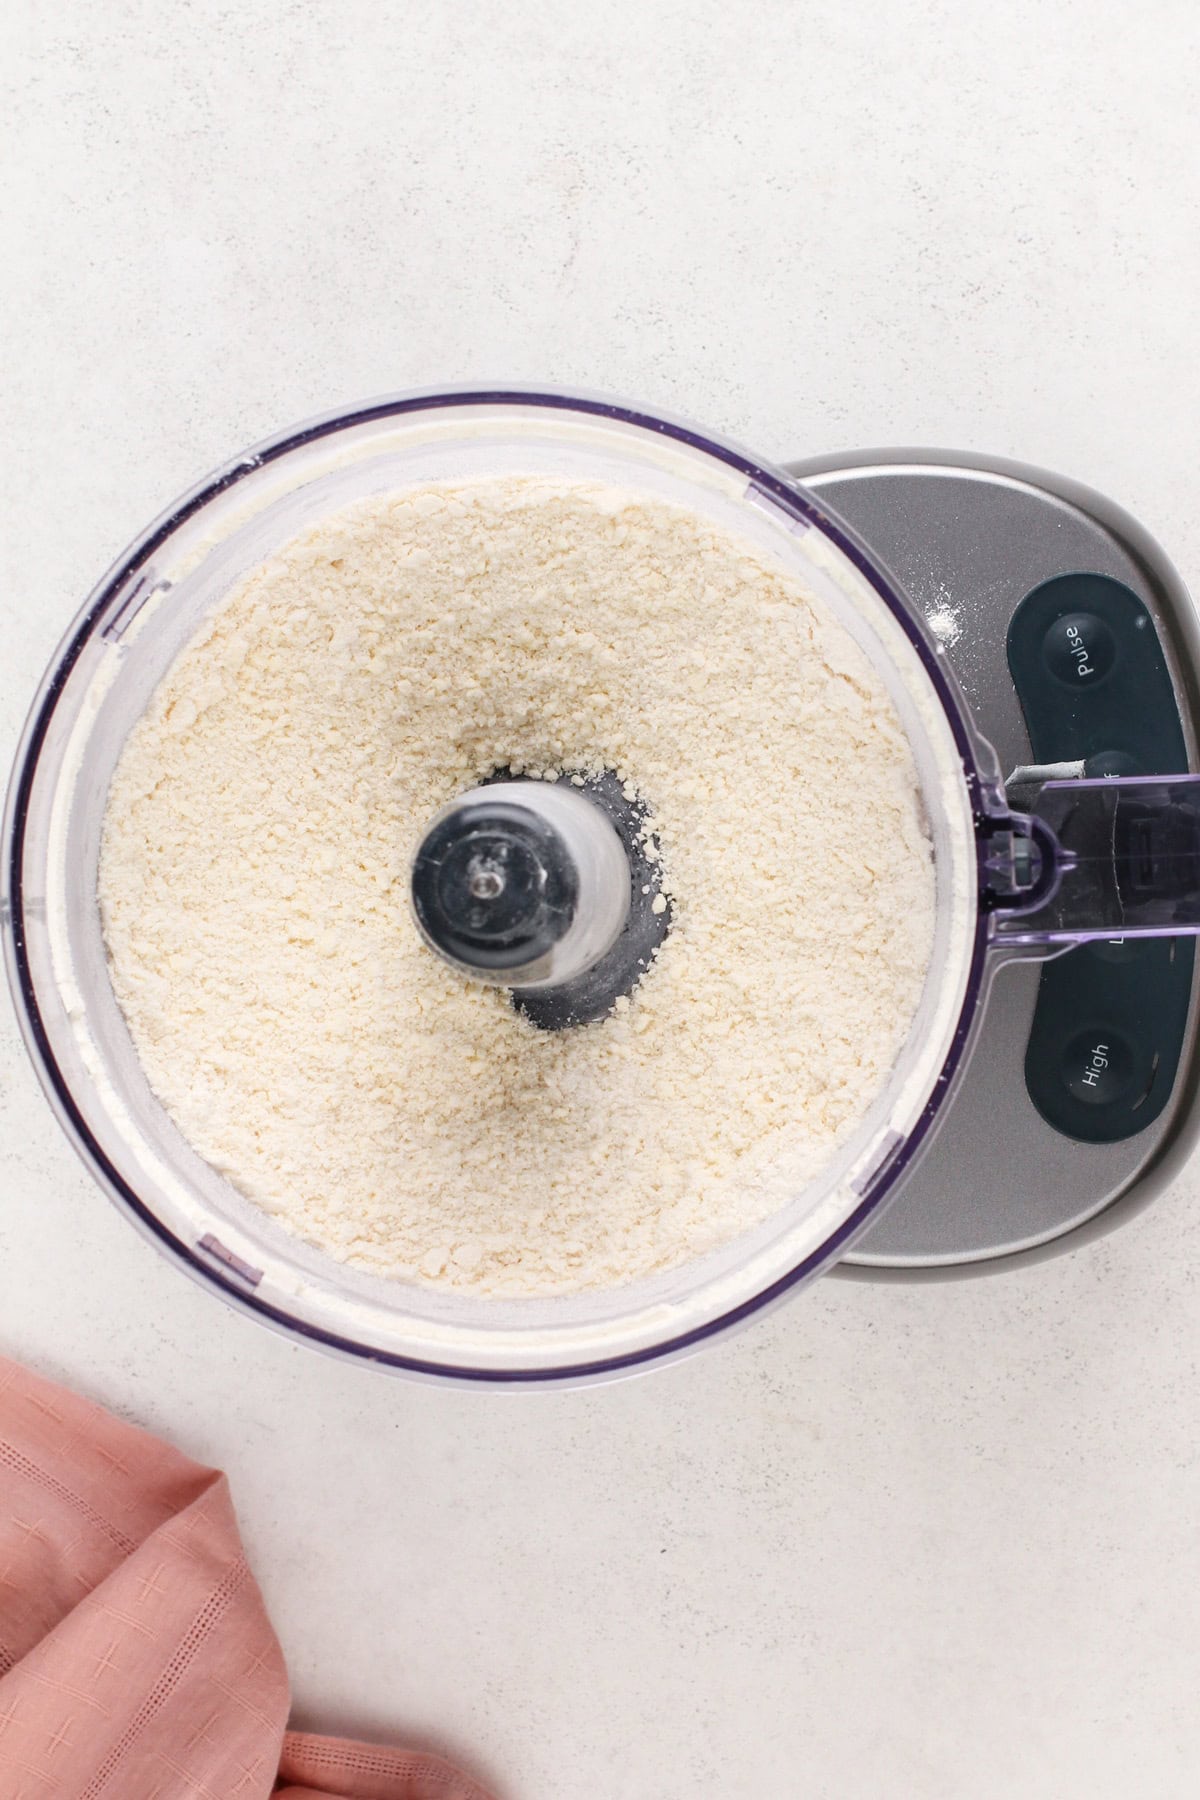
Using a food processor, pulse together the flour, sugar, salt, and cold butter. You want the mixture to resemble coarse meal.
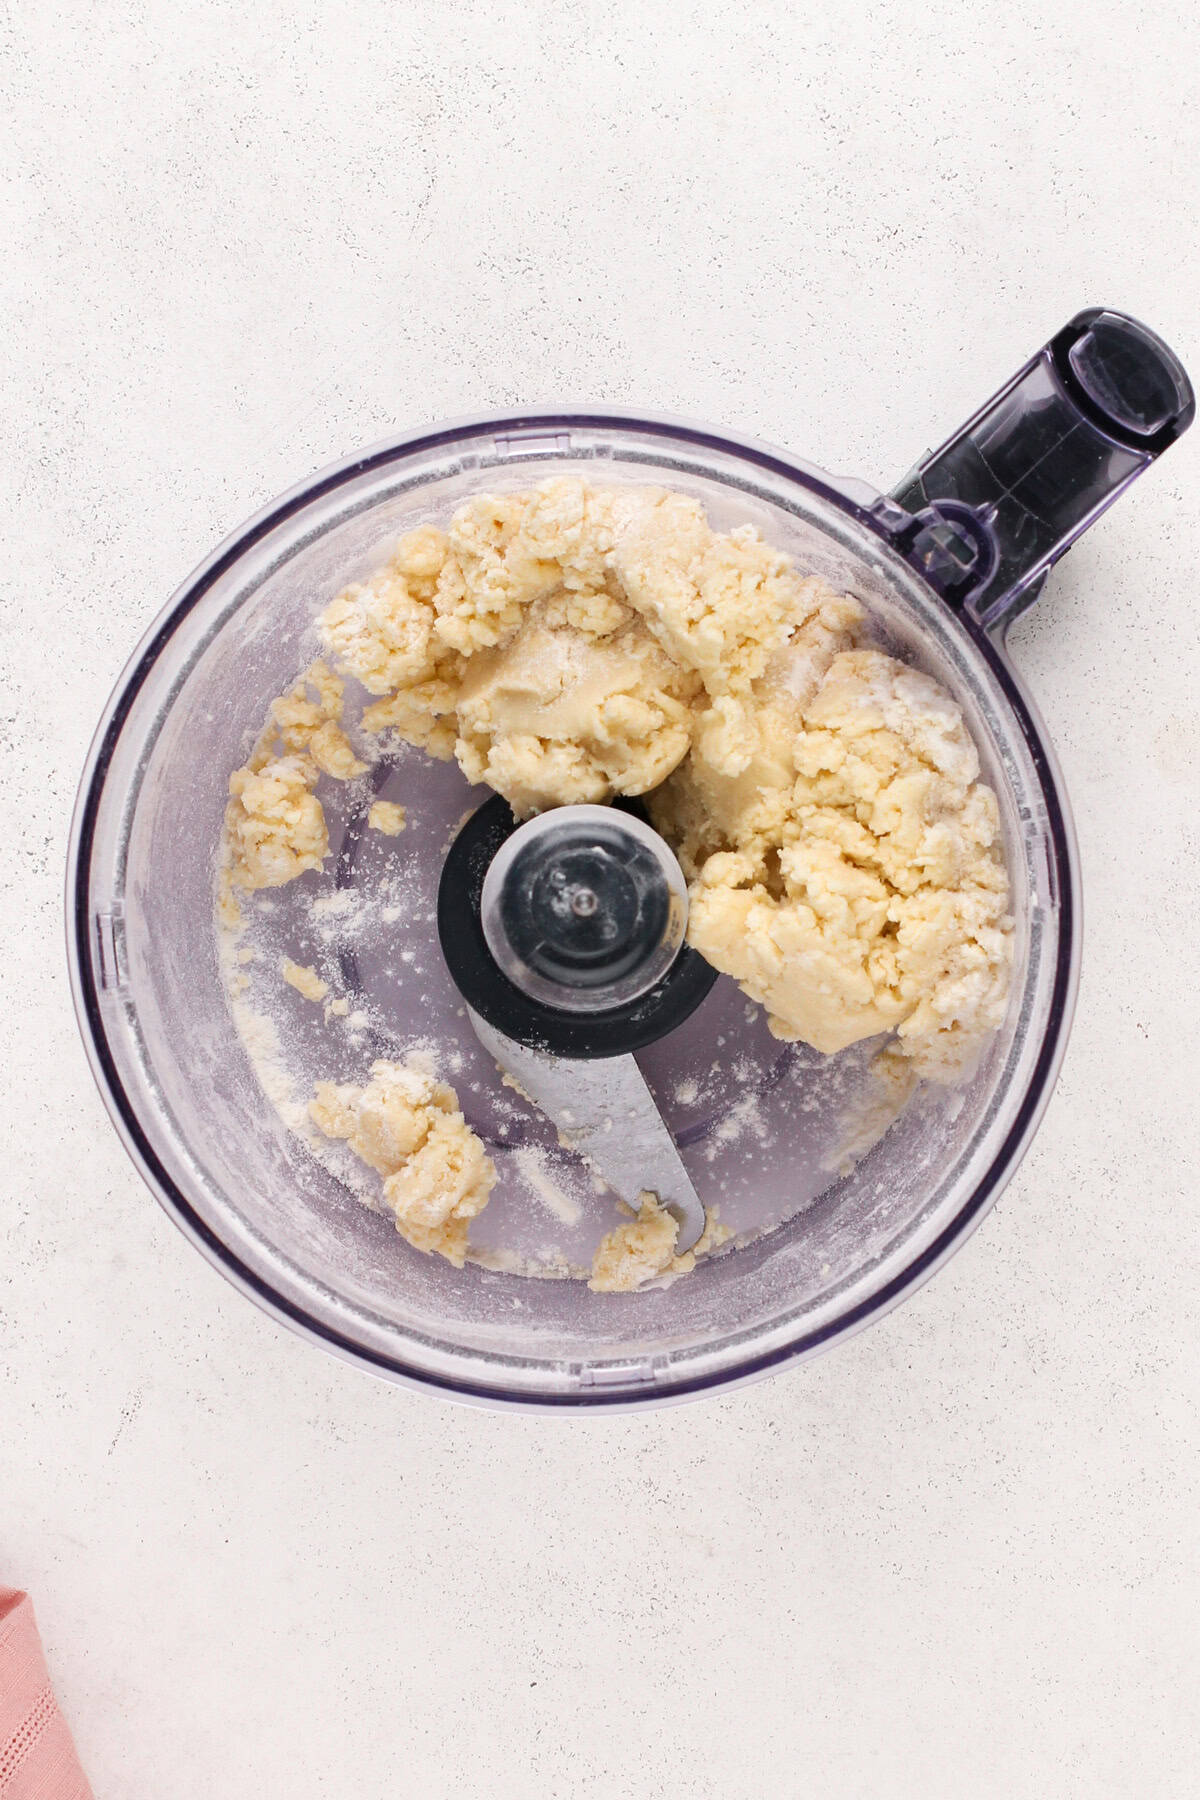
Pour in half of the milk and pulse until the dough comes together into a ball. You might need to add more of the milk, but do so just a splash at a time. You want the dough to be pliable but not wet.
I like to use a small cookie scoop to scoop 1-tablespoon portions of the tart dough into each well of a 24-well mini muffin tin.

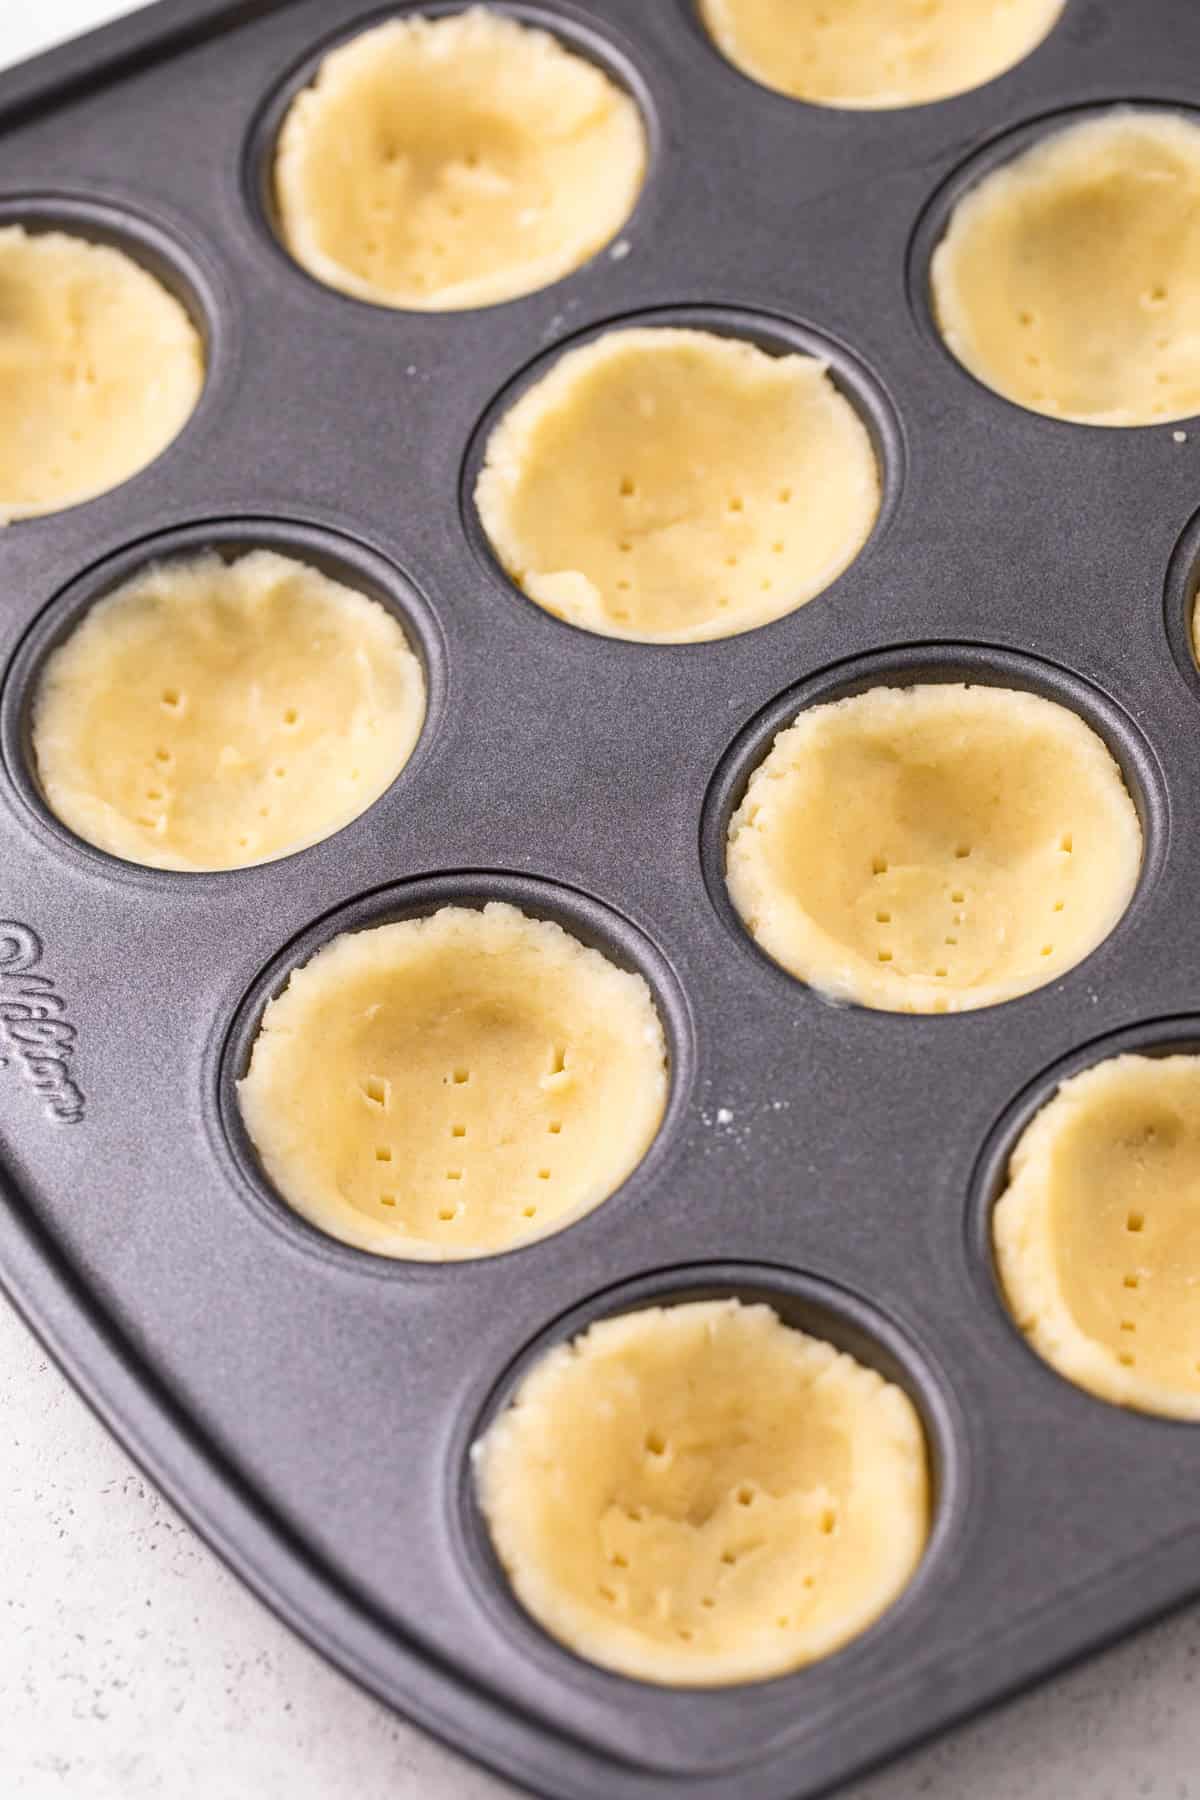
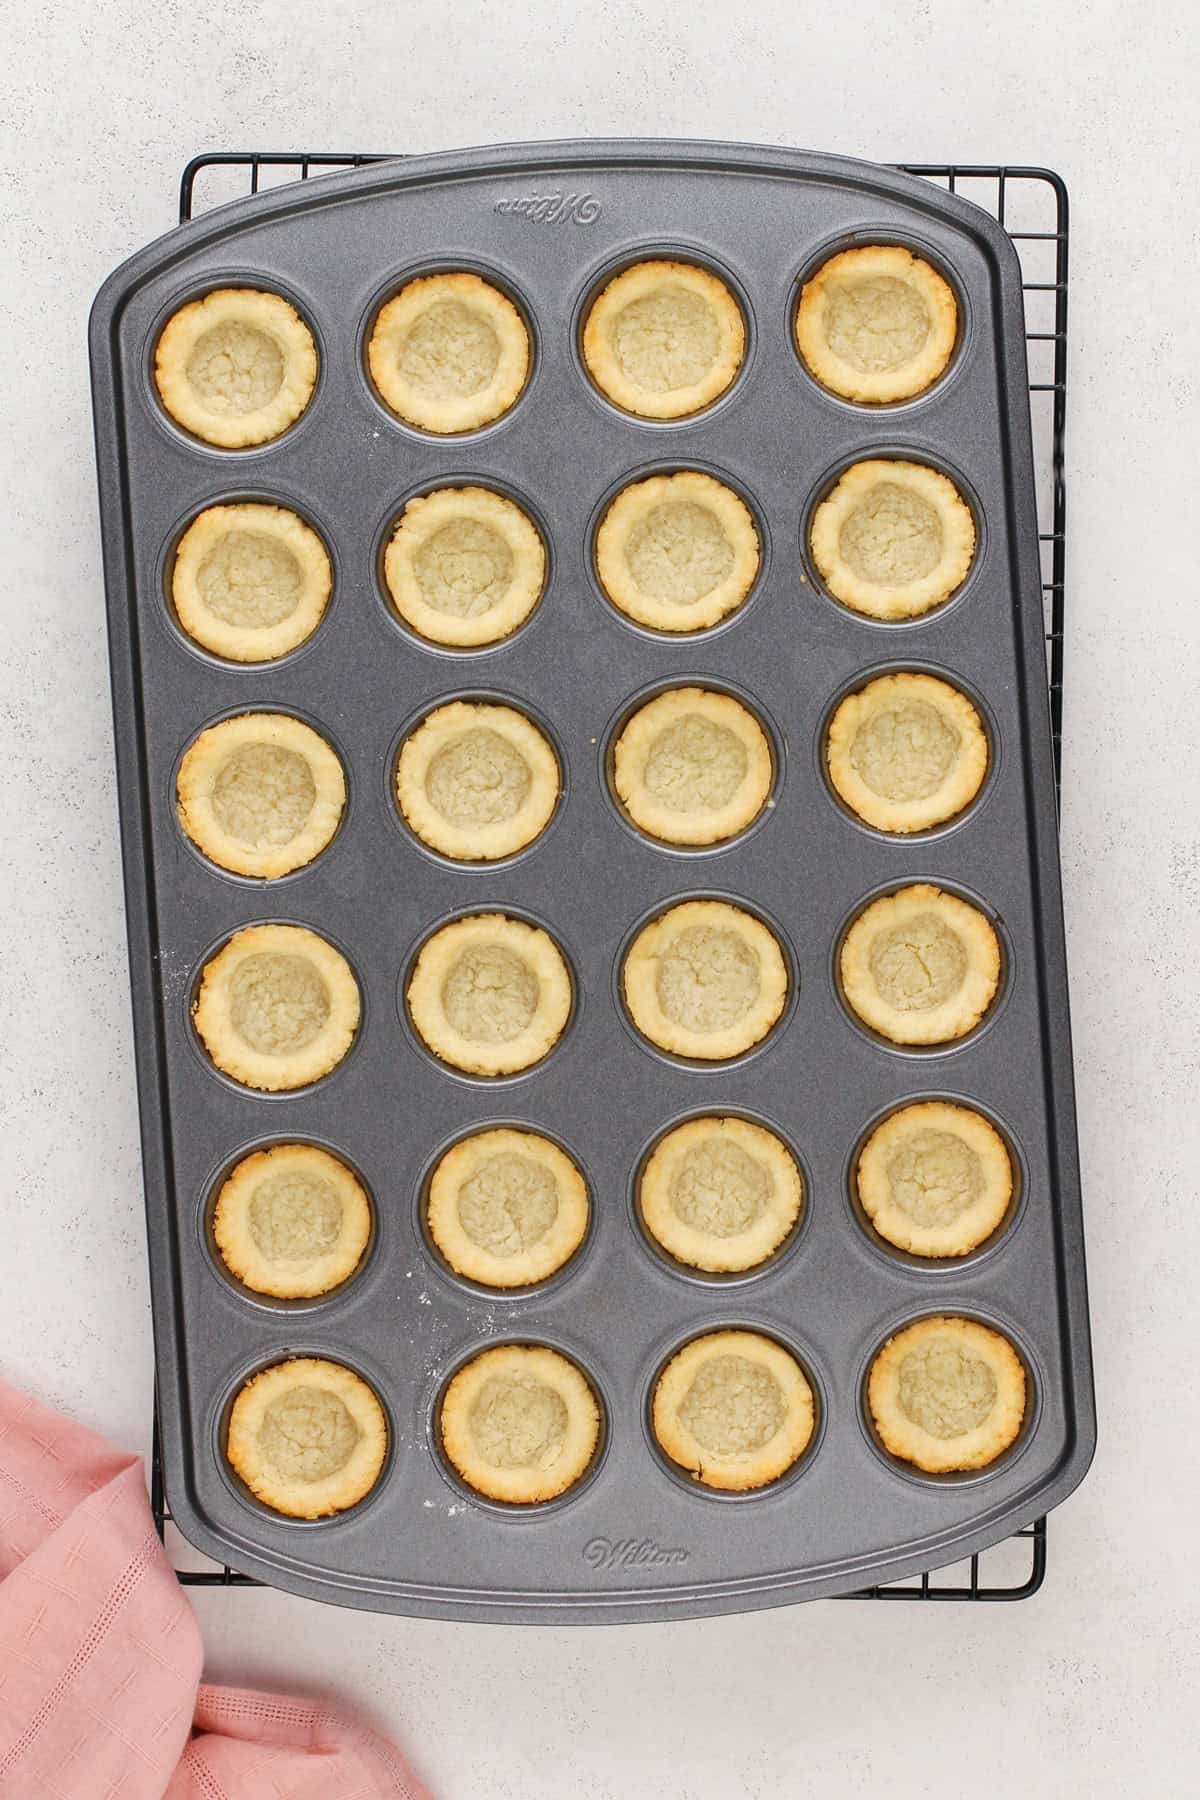
Now, use your fingers to press the dough evenly into the wells, along the bottoms and up the sides. Let the pan chill in the refrigerator for at least 30 minutes before baking.
When ready to bake the tart shells, poke the bottoms of each shell a few times with a fork. Bake at 350°F for 13-16 minutes; you want the edges of the shells to be golden.
Let the shells cool in the pan completely before using a small offset spatula to gently lift them out and onto a platter or wire rack.
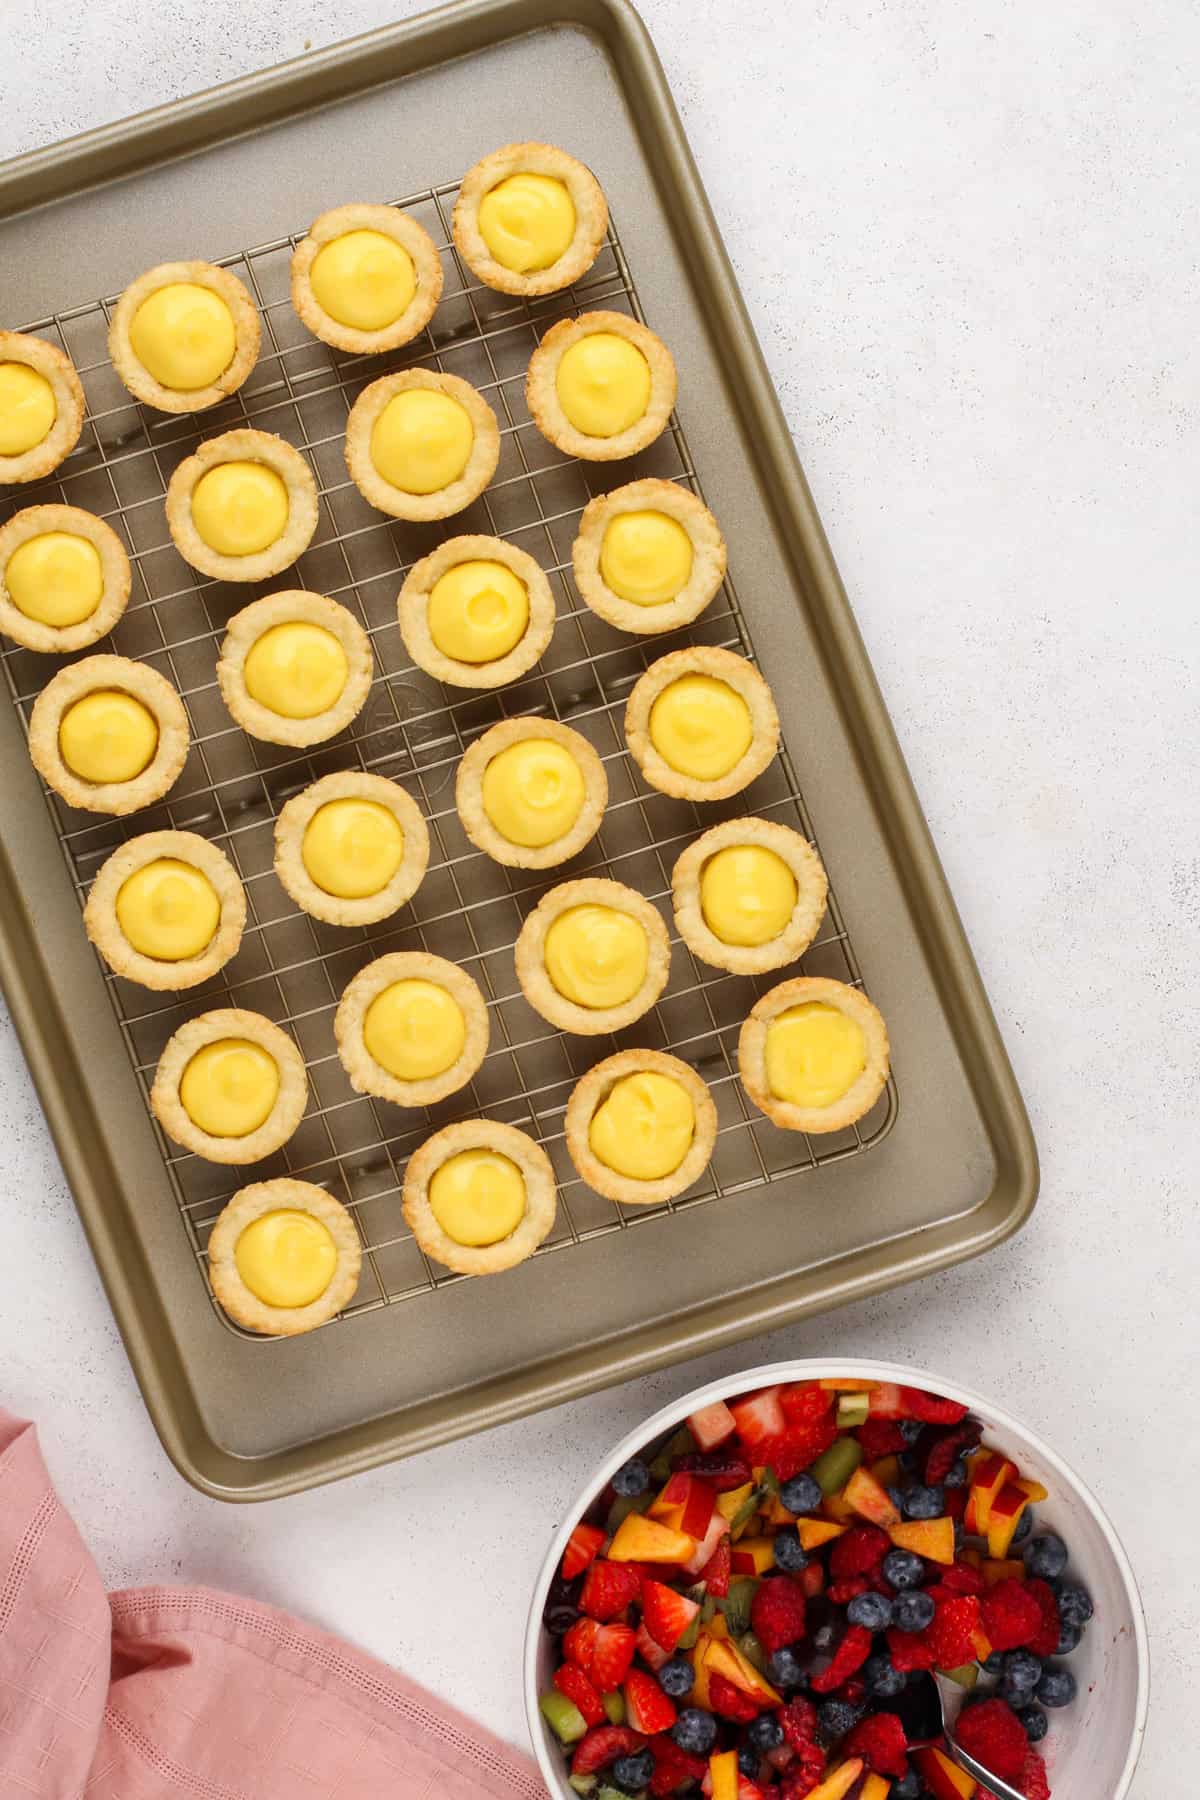
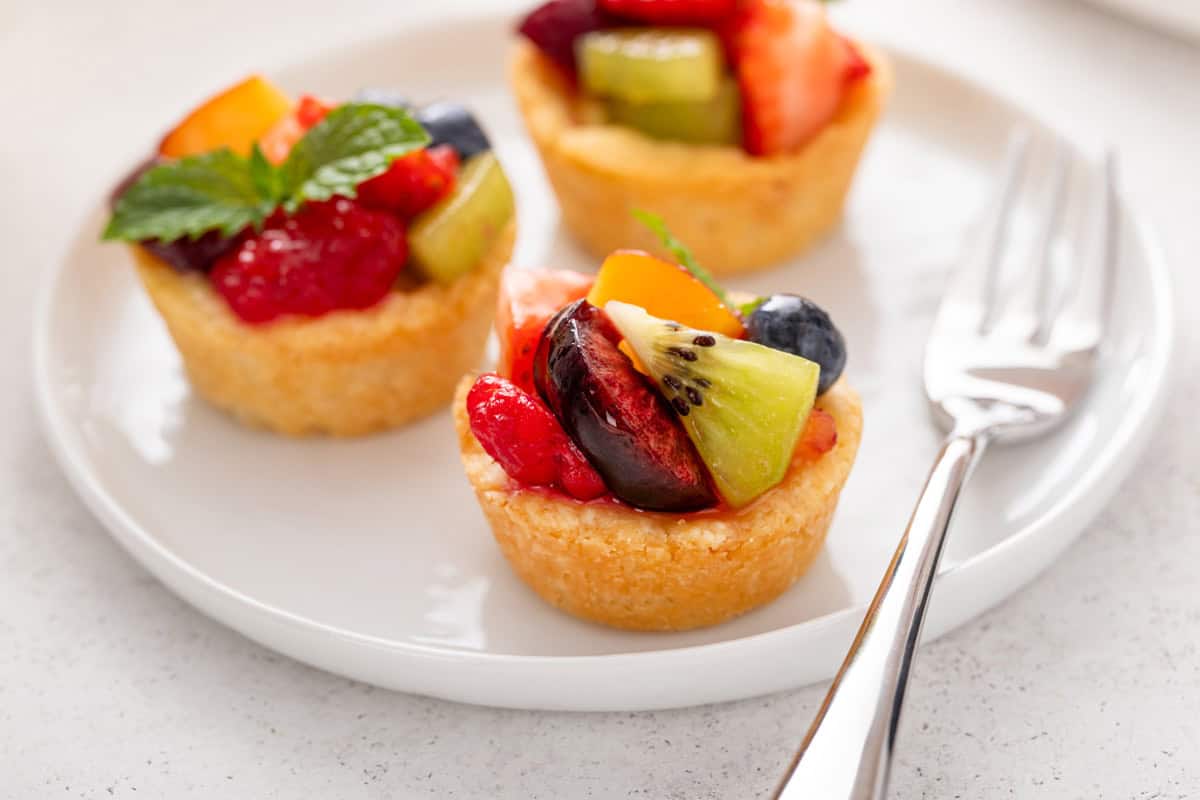
Fill each shell with a generous teaspoon of pudding and arrange the fresh fruit on top as desired.
If you want to glaze the tarts, mix the apricot preserves with 1 teaspoon of water and microwave for 15-30 seconds, just until melted. Gently brush this mixture over the fruit.
Serve the mini fruit tarts immediately or store them in the refrigerator until ready to serve, preferably the same day they are assembled.
Make-ahead tips
I recommend serving these mini fruit tarts the same day they are assembled.
But if you want to do some prep ahead of time, make the components to assemble later:
- Store baked and cooled tart shells in an airtight container at room temperature for up to 2 days.
- Store vanilla pudding in an airtight container in the refrigerator for up to 3 days.
- Store diced fruit in an airtight container in the refrigerator for up to a day. Keep in mind that cut fruits may release some of their juices during this time.
Then, you can assemble the tarts just before serving. No one will guess that you did most of the work days before!
Variation ideas
If you love the idea of these mini fruit tarts but don’t have time to make the shells and the pudding from scratch, you have a couple of options.
You can use mini phyllo shells in place of the homemade tart shells. The flavor and texture will be different from the buttery tart dough, but they work great in a pinch!
Another option is to press sugar cookie dough into the mini muffin wells. This will give you a sugar cookie base instead of a tart shell base.
You could also use your favorite boxed vanilla pudding mix instead of making the homemade pudding for the filling. If you still want to make the filling from scratch but want a cream cheese version, try the filling from my berry cookie cups.
FAQs
I don’t recommend using frozen fruit on these fruit tarts. Frozen fruit releases a lot of juice when it thaws and will make the tarts wetter than we want.
This recipe can use any fruit you like or that is in season, so try making them at different times of the year with different fruit combinations! Berries work great during the spring, while you could make a beautiful citrus version during the winter.
I like to run a small offset spatula around the edge of the shells, then use the tip of the spatula to gently lift the shells out of the tin.
If you find that tricky, you can place a small strip of parchment paper in the bottom of each well before adding the tart dough. Make sure that the ends of the parchment strip extend above the edges of the well.
After baking and cooling, use the ends of the parchment as little handles to lift the shells out of the pan.
Mini Fruit Tarts

Ingredients
For the tart dough:
- 1 ½ cups all-purpose flour
- 4 tablespoons granulated sugar
- ½ teaspoon fine sea salt
- 12 tablespoons unsalted butter cold, cut into pieces
- 3 tablespoons milk
For the filling:
- Generous ½ cup homemade vanilla pudding
- 2 cups diced assorted fresh fruit such as berries, kiwi, grapes, cherries, peaches, etc (see notes)
- 2 tablespoons apricot preserves optional
Video
Instructions
- In the bowl of a food processor, add the flour, sugar, salt, and butter. Pulse several times until the mixture resembles coarse meal.
- Pour in half of the milk, pulsing until the dough comes together in a ball. If needed, add additional milk a splash at a time until the dough comes together – it should hold together and be pliable but not wet. You may not use all of the milk.
- Use a small cookie scoop to scoop 1-tablespoon portions of the dough into each well of (1) 24-well mini muffin tin. Press the dough evenly across the bottoms and up the edges of the wells. Place the pan in the refrigerator and chill for at least 30 minutes.
- While the tart shells chill, preheat the oven to 350°F.
- Once the tart shells have chilled, prick the bottoms of each shell a few times with a fork. Bake for 13-16 minutes, or until the edges are golden. Set the pan on a cooling rack to allow the shells to cool completely.
- Once cooled, use a small offset spatula to gently lift the tart shells out of the pan and onto a platter or wire rack. Fill each shell with a generous teaspoon of the vanilla pudding and top with the assorted fresh fruit.
- If desired, glaze the tops of the tarts by mixing the apricot preserves with 1 teaspoon of water in a small microwave-safe bowl. Microwave for 15-30 seconds, until the preserves are melted. Gently brush over the fruit on the tarts.
- Serve immediately or store in the refrigerator until ready to serve.
Notes
- Store baked and cooled tart shells in an airtight container at room temperature for up to 2 days.
- Store vanilla pudding in an airtight container in the refrigerator for up to 3 days.
- Store diced fruit in an airtight container in the refrigerator for up to a day. Keep in mind that cut fruits may release some of their juices during this time.
Nutrition
Nutrition information is automatically calculated, so should only be used as an approximation.


They taste very good but my crusts shrunk and shriveled up and got thick on the bottom and sides hardly had any thing left to the “wall” so I couldn’t put much filling. I chilled the dough and poked holes with fork before baking. I had the dough in the pan very thin before baking.
Was amazing Highly recommended. I loved the texture and it was just so good. Everyone loved at my house thanks for sharing these.
These were such a big hit at my party and I heard a ton of good reviews! Will be making again.
So happy to hear that! Thanks for sharing, Eliana. Happy baking!
Jamie