This post may contain affiliate links. Please read our privacy policy.
It should be exceedingly apparent by the title of my blog that I bake A LOT. My addiction to baking comes and goes in spurts. Sometimes I will bake up a storm for days using enough butter to make Paula Deen wince, sometimes I don’t bake for weeks at a time. The amount of baking that occurs in any given week depends on 4 very important factors…
1. my schedule;
2. my level of laziness;
3. how tight my pants fit and
4. inspiration.
This recipe falls under the inspiration category…I have seen homemade Oreos pop up in the blog world on numerous occasions, but when I had the idea to dye the centers pink for Valentine’s Day I made them that night.
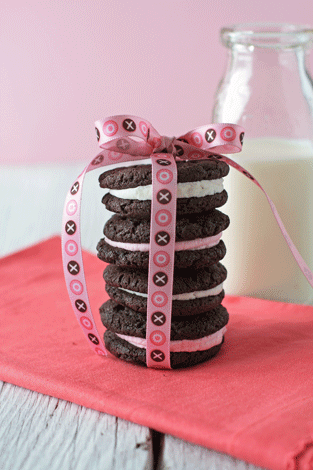
I was delighted how these turned out…the pale pink center just screams Valentine’s Day and would also be perfect for spring…think pale orange, yellow, blue and green! If you are not into dying the centers, that’s fine too because as you can see they are just darling when kept white. I was honestly pretty shocked at the flavor of the chocolate wafers because they taste very similar to the real deal. Brian put it best when he said they taste just like Oreos, only better! You may not see much of me next week because I am thinking factor 3 (see above) may be a cause for minimal baking after consuming these addictive little cookies. Have a fabulous day and a great Valentine’s Day! Thanks so much for taking the time to check out My Baking Addiction!
Homemade Oreos
Ingredients:
For the Chocolate Wafers
1 1/4 cups all-purpose flour
1/2 cup unsweetened Dutch process cocoa (I used Hershey’s Special Dark Cocoa)
1 teaspoon baking soda
1/4 teaspoon baking powder
1/4 teaspoon salt
1 to 1 1/2 cups sugar [see recipe note]
1/2 cup plus 2 tablespoons (1 1/4 sticks) room-temperature, unsalted butter
1 large egg
For the Filling
1/4 cup (1/2 stick) room-temperature, unsalted butter
1/4 cup vegetable shortening
2 cups sifted confectioners’ sugar
2 teaspoons vanilla extract (I used clear vanilla extract)
Optional- Gel dye
Directions:
1. Set two racks in the middle of the oven. Preheat to 375°F.
2. In a food processor, or bowl of an electric mixer, thoroughly mix the flour, cocoa, baking soda and powder, salt, and sugar. While pulsing, or on low speed, add the butter, and then the egg. Continue processing or mixing until dough comes together in a mass.
3. Take rounded teaspoons of batter and place on a parchment paper-lined baking sheet approximately two inches apart. With moistened hands, slightly flatten the dough. Bake for 9 minutes, rotating once for even baking. Set baking sheets on a rack to cool.
4. To make the cream, place butter and shortening in a mixing bowl, and at low speed, gradually beat in the sugar and vanilla. Turn the mixer on high and beat for 2 to 3 minutes until filling is light and fluffy. (Optional: Blend in a tiny bit of gel dye until you reach the desired color.)
6. To assemble the cookies, in a pastry bag with a 1/2 inch, round tip, pipe teaspoon-size blobs of cream into the center of one cookie. Place another cookie, equal in size to the first, on top of the cream. Lightly press, to work the filling evenly to the outsides of the cookie. Continue this process until all the cookies have been sandwiched with cream. Dunk generously in a large glass of milk.
Notes:
- I used Hershey’s Special Dark Cocoa Powder instead of Dutch Processed.
- I used Wilton Gel Dye to color the centers.
- Once I measured out a rounded teaspoon of dough, I rolled the dough into small balls before baking.
This recipe is slightly adapted from Smitten Kitchen and can be found at http://smittenkitchen.com/2007/05/my-kingdom-for-a-glass-of-milk/
All images and text ©Follow Jamie on Instagram. We love to see what you're baking from MBA! Be sure to tag @jamiemba and use the hashtag #mbarecipes!
[pinit]


I made these a couple nights ago,just for fun,I didn’t expect them to be so good!!!! They’re better than Oreos!!!! Thanks for the recipe!
Love! So yummy! My husband and I were having a craving for these and I just Googled ‘homemade oreos’ and chose this recipe! It’s awesome! We thoroughly enjoyed them! Every last crumb!
hi!i’ve try this recipe and its great!thanks a lot.i really love it!
i’ll make it again for sure because everybody loves it too. :)
I am excited to try these out! Does anyone know how long they will stay fresh? I am having a bridal shower and would like to make them ahead of time if possible. Thanks! Love your blog!
This is perhaps the easiest recipe ever. I MUST try these!
I made these and they are yum! A little more butter was needed for me and a bit more filling (and a new pastry bag cause mine split) But I will be baking these again soon!
I make these at Christmas (or did until my dairy allergy) but the middle had cream cheese in the middle…yum