This post may contain affiliate links. Please read our privacy policy.
Hey MBA readers! I’m happy to introduce you to the lovely Lindsay White from Olive Tree Handmade. Lindsay does a bit of behind the scenes work here on My Baking Addiction, so I thought it was about time that I officially introduce you to her. She’s super talented and has some fantastic holiday inspiration coming your way in the next few months, so you’ll definitely want to stay tuned. Welcome, Lindsay!
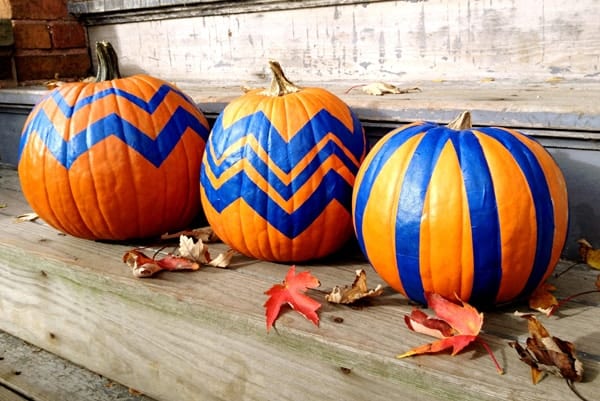
Hi Everyone! I’m Lindsay from Olive Tree Handmade and, I’m super excited that Jamie asked me to do guest holiday craft posts! I design and create jewelry for my shop on Etsy and, think of myself as a fairly crafty person so I thought this would be really fun. Whenever I’m on Pinterest I see hundreds of D.I.Y. crafts that look amazing and so easy to make but, how many of us actually go through with it? I found two Halloween projects that looked like they’d be cool to try: Chevron Pumpkins by MySweetSavannah (I love chevron everything) and, Skull Treat Boxes by Martha Stewart.
Chevron Pumpkins
For this project you will need:
- pumpkins: real or fake ( foam or plastic ones cost a bit more but, will last you more than one season!)
- painter’s tape
- acrylic craft paint
- small paint brushes

*You can’t really tell from the photo but, I painted the stems with gold glitter paint to add some sparkle…and because glitter paint is amazing.
Skull Treat Boxes
For this project you will need:
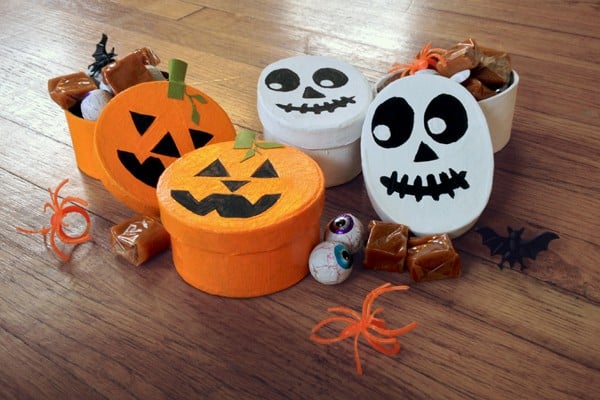
- egg-shaped paper mache boxes, I also got round ones to make jack-o-lantern treat boxes
- acrylic craft paint
- small paint brushes
These skull treat boxes were too cute to not make! The local craft supplies store did not have the same egg-shaped treat boxes that are shown on the Martha Stewart website so, I improvised with the oval and round boxes that were available. Paint the boxes and let them dry completely. Next you can either stencil on or free-hand (I did this lightly with a pencil) the faces. Using a very small paint brush fill in the lines. For the jack-o-lanterns I used some green cardstock for the stems and leaves. Final step: stuff with as many treats as possible! These boxes couldn’t be easier to make and the final product is adorable!


I love the alternatives to carving pumpkins.
Love these crafty pumpkin ideas:))! Thank you for the inspiration!
Oh my goodness! These crafts are so cute and fun! :)
These look so easy! I don’t generally think of myself as a crafty person, but I think I could even pull off those pumpkins.
Exactly what I was thinking, Loretta. I think I could actually impress my kids. :)
Great post, Lindsay!
This is obviously my favorite time of year, since my favorite color is orange – you can imagine how decoration and craft-crazy I get! Love the orange and blue pumpkins… I’ll show my Bucknell colors with pride!
What great ideas! I wish I was that creative!
Love both of these crafts but especially the pumpkins! Love that white one in the middle – gorgeous!
Love love LOVE the chevron pumpkins!!!
I just love those chevron pumpkins, Lindsay! I’m pretty sure you’re going to see my front steps adorned with those before the week is over. Great guest post :)
These pumpkins are the best! Great decorating ideas!