This post may contain affiliate links. Please read our privacy policy.
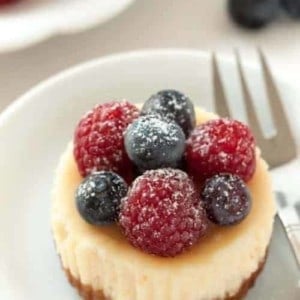
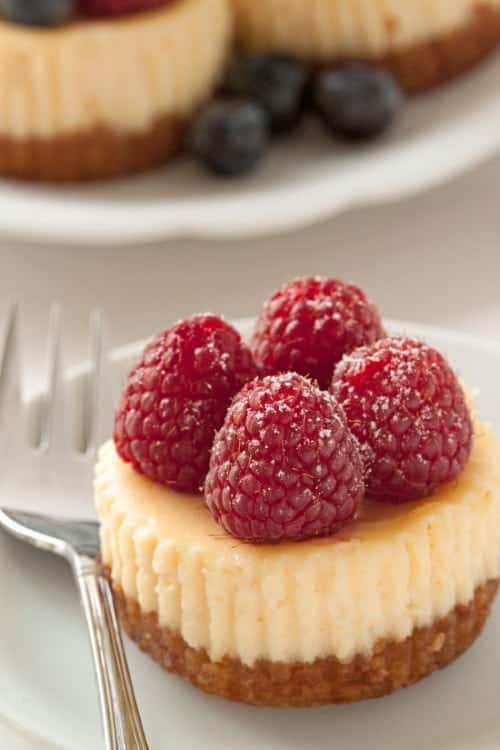
These fuss-free gluten-free mini cheesecakes are perfect for parties or potlucks and couldn’t be any easier to make!
I really love cheesecake. Like really love it. But you won’t find a single recipe for a full-sized cheesecake on my blog because I rarely find myself with a reason to make 16 servings of cheesecake.
If I made a cheesecake without a real purpose or some place to send it, I’d eat a copious amount, get sad and then make something else to help me get over my grief. It’s a vicious cycle. With these gluten-free mini cheesecakes, you get everything you could want from a cheesecake but with built-in portion control! Eat one or two and freeze the rest.
The other reason I don’t make full cheesecakes is that it’s just so much more fussy than making mini cheesecakes! You don’t need to worry about water baths, cracks in the filling or refrigerating the cheesecake overnight. I don’t know about you, but when I make dessert, I want it now and not to wait for what feels like an eternity. In the directions, I say to chill the cheesecakes for 2 hours before serving, but if you’re in a hurry (or just really want your cheesecake!) you can pop them in the freezer for about 30 minutes.
I’ve had some less than stellar gluten-free crusts in the past but this one is perfect! Pre-baking the crusts and letting them cool slightly prevents the crust, which is almond flour based, from getting soggy. If you don’t have almond flour, you could use another type of nut flour or meal. I’m thinking hazelnut meal would be tasty!
I added a bit of lemon zest to the crust to liven it up and don’t recommend skipping this step because the crust would taste pretty neutral otherwise. Alternatively, you could add lime or orange zest or even a little extract to the crust if you want it a little more zippy. And the filling? So rich, creamy and smooth! I used just a little less sugar than often called for but none of my taste testers missed it or even noticed.
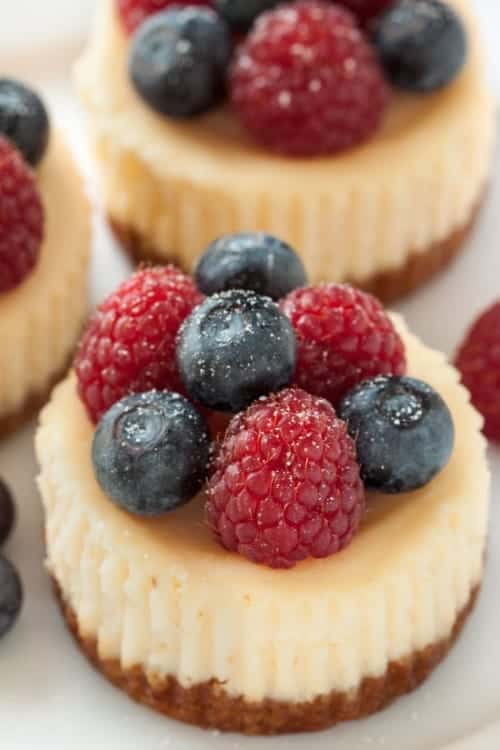
You can decorate the mini cheesecakes simply with blueberries and raspberries like I did or use a dessert sauce, like my honey sweetened strawberry sauce. And if it’s already too hot to bake and you need some cheesecake now, try Jamie’s no-bake lemon Oreo cheesecakes (but make sure to use gluten-free ingredients, if necessary!)
Gluten-Free Mini Cheesecakes
Ingredients
For the crust:
- 1 ¼ cups blanched almond flour
- ¼ cup granulated sugar
- pinch of salt
- 1 tablespoon lemon zest
- 3 tablespoons unsalted butter melted and cooled slightly
For the filling:
- 2 8-ounce packages cream cheese
- ½ cup granulated sugar
- 1 teaspoon vanilla extract
- pinch of salt
- 2 large eggs room temperature
For decoration:
- berries and powdered sugar optional
Instructions
- Preheat the oven to 350 degrees F. Line a muffin pan with 12 muffin liners.
- Prepare the crust. In a medium mixing bowl, stir together all the dry ingredients, then stir in the butter and mix until thoroughly combined.
- Divide the mixture between the liners (18 grams or 3 1/2 teaspoons of mixture per liner) and lightly press down with the bottom of a shot glass.
- Bake for 10 minutes or until very lightly browned. Remove from the oven and cool for at least 10 minutes while preparing the filling.
- Using an electric hand mixer or a stan dmixer fitted with the beater attachment, beat the cream cheese and sugar at medium speed until light and creamy. Add the vanilla and salt and beat until combined. Beat in the eggs on low, one at a time, and just until well incorporated. Do not over mix!
- Fill each liner about 2/3 full with the batter and bake for 10 minutes or until the centers of the cheesecakes don't jiggle when the pan is tapped. Open the oven door (at least 1 foot wide) and let the cheesecakes cool to room temperature - about 1 1/2 hours. For easiest removal, remove the paper liners now. They can also be removed after chilling, though a little more cheesecake may stick to the liners then.
- Chill for at least 2 hours before serving. Decorate with berries and dust with powdered sugar, if desired. Refrigerate for up to 4 days.
Notes
- If you need these to be gluten-free, make sure all your products are certified gluten-free.
Nutrition
Nutrition information is automatically calculated, so should only be used as an approximation.


Can’t wait to try this. Thanks for sharing. Just wondering if I can use goat cheese instead of cream cheese as its easier to digest for lactose intolerant folks?
I’ve never used goat cheese in cheesecake so I’m afraid I have no idea. If you’ve had good luck subbing it for cream cheese in other cheesecake recipes, it’d likely work here. I hope you’ll enjoy them!
Thanks for posting these mini cheesecake recipes. They look so awesome! I have a question on the baking time.
You mentioned the baking time is 10 minutes at 350F, vs. the baking time in your other mini cheesecake recipe (with graham cracker) is 20-25 minutes at 300F. Which method is better?
Thank you! There’s not really a better method. For this recipe, 350F for 10 minutes is what worked best for me. The other recipe that’s linked to in the comments that’s baked at 300F for 20-25 is a totally different recipe with different amounts and ingredients (it has cream, for example). For that one, 300F for 20-25 is best. I don’t recommend playing around with baking temperatures and times unless you feel like experimenting and possibly ruining a few batches before you get your desired outcome. I say this from experience. ;) I hope you’ll enjoy the cheesecakes if you try them!
You mentioned freezing these. Our son is getting married and I want to make these for the rehearsal dinner. How long could I freeze them for?
I freeze mini cheesecakes for months at a time but since this is for something special, I’d keep it under one month. I hope you all will enjoy them and congratulations to your son. :)
Continued from previous comment… Thank you for your speedy reply! I ended up using 6 TBS of butter for the crust and they’ve turned out perfectly. Thank you so much, I’m thrilled they’ve turned out so well.
I’m so happy they came out well! But what kind of almond flour did you use? Or did you make any changes to the recipe? If I used 6 tablespoons of butter with my almond flour in this recipe, the crusts would be a soupy mess. ;) Thanks for coming back to let me know how they turned out!
Thank you for this recipe, it looks amazing! What consistency should the base have prior to baking? I’ve used 3 TBS of butter as the recipe shows but it seems to give a very crumbly base. Would adding more butter help? I so want to get these right.
It should be like a graham cracker crust. Quite crumbly, not dough-like, and kind of wet. Once you pat it down into the liners, it should stick together. I hope that makes sense and that you’ll enjoy the cheesecakes!
I am having 6 people over for dinner and actually would prefer the entire cheesecake, but your recipe sounds good ! Would you have any different recommendations for baking an entire one in a springform pan? Do you think this quantity of ingredients would work for a 12 ” spring form pan?
I just looked at full-sized regular cheesecake recipes (like this one) and for a 9″ springform, they call for double the amount of ingredients I called for in this mini cheesecake recipe! The area of a 9″ springform is 63 and the area of a 12″ springform is 113. So you’d actually have to quadruple this recipe (at least the filling) to fit a 12″ springform, which I definitely don’t recommend. I looked for a 12″ cheesecake recipe to send you but I’m not really seeing any. They usually call for 9″ pans. Do you have one of those?
Made the mini-cakes and they came out great just as described in the recipe. I used honey (about 1/4 cup) in the mixture instead of sugar and no sugar in the crust. All enjoyed the richness, very satisfying.
I’ll have to try honey in these. That sounds great! And I love that you omitted the sugar in the crust. I’m all for making healthy changes to recipes. :) Thanks for your tip and your feedback!
Thanks for this recipe, we were looking for something to bring for a Gluten Free meal. I made the recipe as described but cooking time seems off for me, kept adding 3min increments to finish at 20min rather than 10. Can wait to try these tomorrow.
I’ve never had these take that long but every oven and pan is different. :) I hope you and the others will enjoy them and thanks for your comment!
I want to make these but was planning to use a gf graham cracker (like Pamela’s) to make the crust. Wondering why not that route to get the graham cracker authenticity. Have you tried that?
I haven’t tried that but I’m sure it’d work if they’re just like regular graham crackers! I love how simple this crust is and how it doesn’t have any processed ingredients so I’m pretty happy with it. :)
Has anyone tried sugar substitute for the granular sugar? Looking for diabetic friendly recipe.
I haven’t tried it myself but I’ve heard great things about Swerve, which measures cup for cup just like sugar. I hope that helps!