This post may contain affiliate links. Please read our privacy policy.
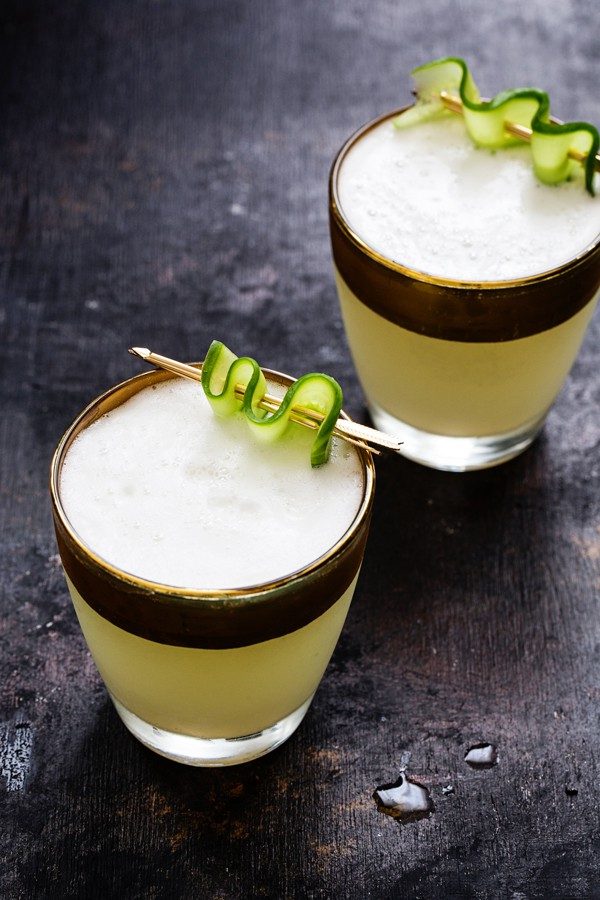
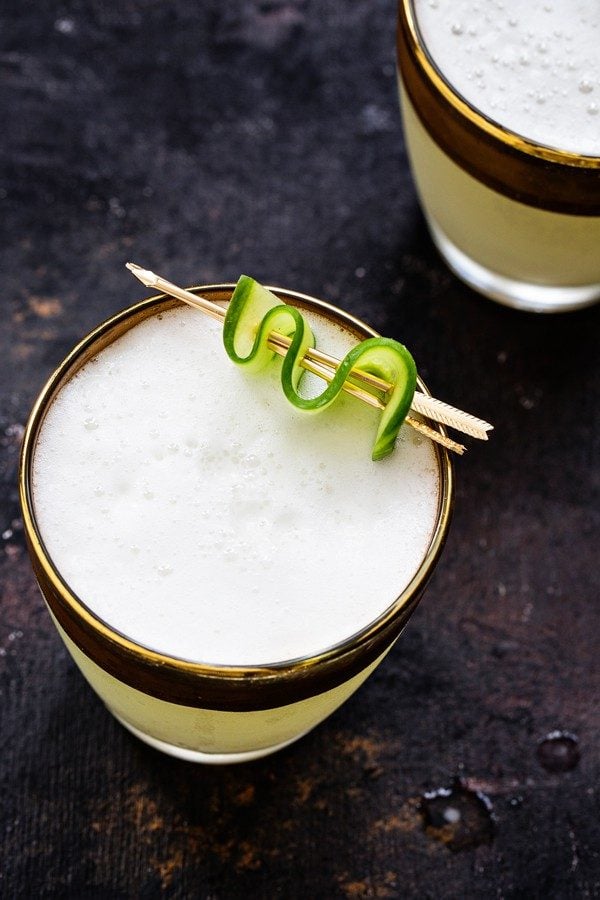
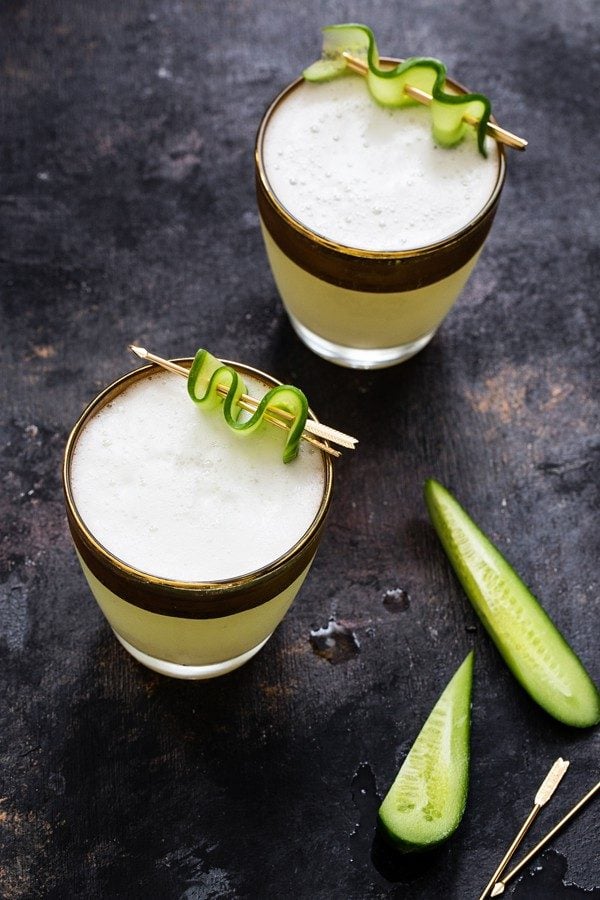
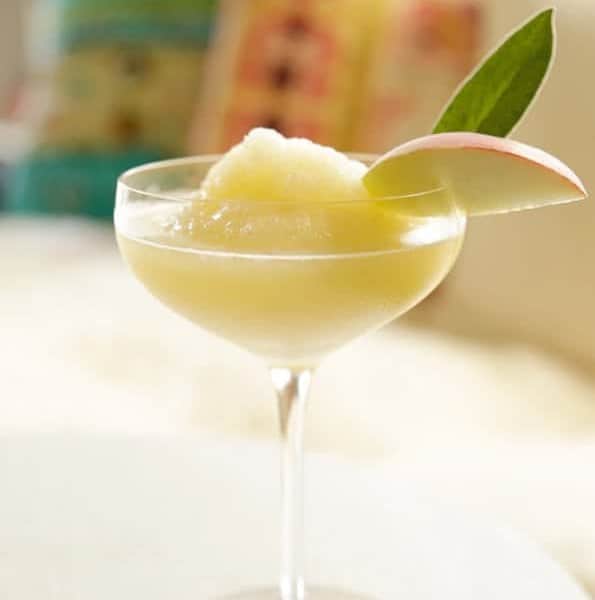
This Cucumber Gin Fizz is a delightful, herbaceous cocktail worthy of your Friday night. It’ll kick off the dinner pre-game in just the right way. You may not even move past the bar nuts and cheese or crackers, but who needs to?
This post is sponsored by Adobe. All views and opinions are 100% my own. Thank you for continuing to support the brands that make My Baking Addiction possible.
Today’s post is going to be a little different because we’re going to talk about photography. Although my email inbox tends to fill up with recipe questions, I also get a lot of inquiries regarding the photos on my site.
People often ask about camera gear, lighting sources, editing software, etc., so when Adobe asked me to share some photography tips, I thought I’d answer some of the most common questions that I receive.
Let me preface this whole post by saying that I am most definitely not an expert in the field of food photography. When I started My Baking Addiction, on a whim in the summer of 2008, I was a special education teacher in grad school who liked to bake cupcakes on the weekends. And I hadn’t used anything other than a point-and-shoot camera.
Pretty much everything that I’ve learned has been through trial and error. And trust me, there have been A LOT of errors. Just take a look back in the recipe archives if you don’t believe me.
LIGHTING
Since I shoot my photos with natural light, my set up is pretty mobile. I shoot wherever the light is best, at the time of day that I need to shoot. Sometimes that’s on the floor of my home office, sometimes it’s on my dining room table, and sometimes it’s in my garage for the whole neighborhood to see.
I think you have to be a little flexible when using natural light because of the shifts during different times of day, as well as the seasonal changes that occur throughout the year.
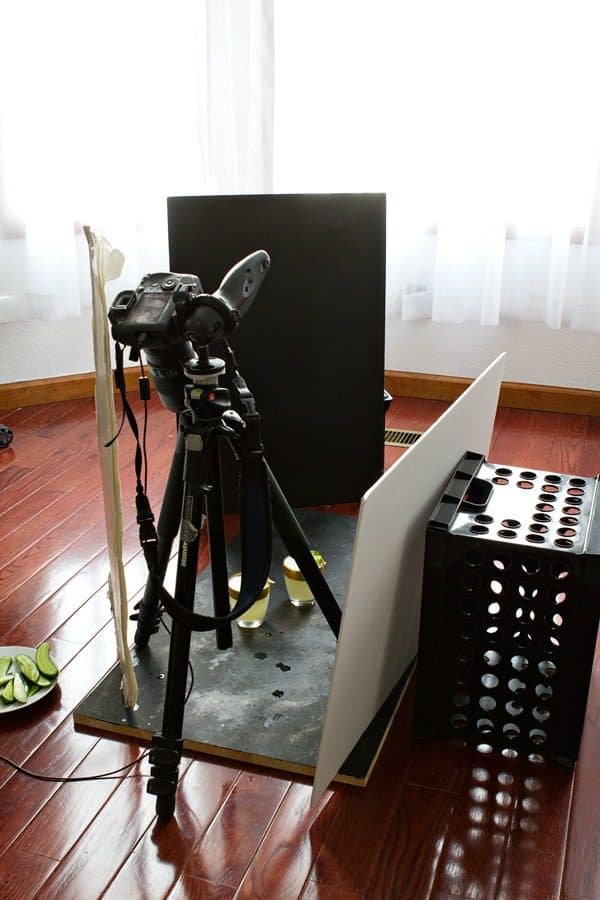
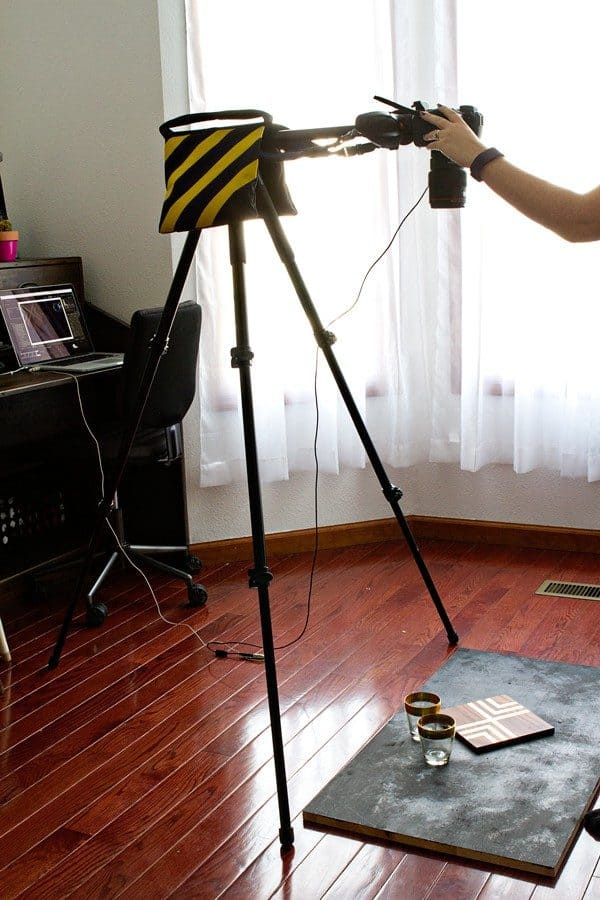
I would say that 80% of the photos from the past year are shot back-lit, which means the main source of light is coming from behind the subject (cake, cupcake, cocktail). I often use inexpensive foam board to either bounce or block the light as shown in the photo below.
GEAR
When I started my blog, I purchased an entry-level DSLR camera and that was it. I took all of my photos handheld and would end up snapping no less than 50 photos for every recipe.
I’d load them into Adobe Photoshop Elements and cross my fingers that 2 of the 50 would be decent enough to use. I eventually transitioned from Adobe Elements to Adobe Lightroom because I wanted to explore its capabilities and enhance my workflow.
In 2009, I decided to invest in a tripod and honestly, haven’t looked back since.
Many food photographers don’t like the limitations of a tripod; however, I find using one to be quite necessary. I don’t have super steady hands and often use heavy lenses such as the Canon 24-70mm f/2.8L, which, coupled with the weight of my camera body, can make it quite difficult to photograph without a bit of shakiness, which leads to blurry photos.
For me, a tripod is as essential as my camera.
The photos for this Cucumber Gin Fizz were shot in my friend Emily’s studio on a sunny afternoon. As you can tell from the image above, we set the surface on the floor and were shooting back-lit.
I knew that I wanted these images to be a bit dark and moody, so we chose a dark surface and blocked some of the light coming through by using a black piece of foam board.
TETHERED SHOOTING
Although a tripod helped cut down on the number images I was taking of each recipe, nothing has upped my food photography game more than shooting tethered.
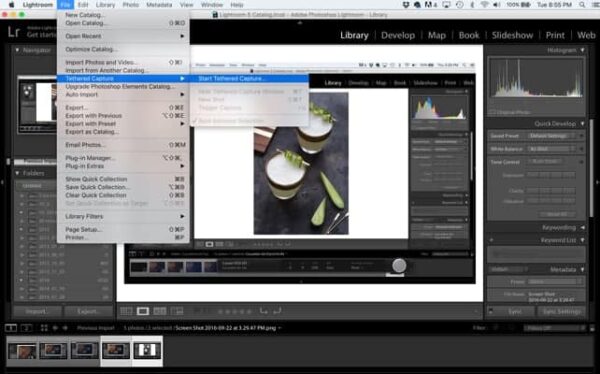
If you’re not familiar with tethered shooting, basically you connect your camera to your computer while running a software program such as Adobe Lightroom. This allows you to see a large version of the image on your computer screen immediately after you snap the photo.
If you’re not shooting tethered, you’re kind of forced to count on the small screen on your camera to view your images.
Shooting tethered allows you to make subtle tweaks to the composition and lighting to create a more refined image. Before shooting tethered, I would upload a set of photos for editing and inevitably, I’d wish I would’ve made a few subtle changes to the setup and styling. And of course, this would be long after I’d cleared everything up from the shoot, making re-shooting a pain and a half.
You can imagine how helpful this can be for shooting overhead images. Tethering allows you to control the images from the computer on a large screen to avoid having to climb onto a step ladder and look into the small window/view finder.
OTHER ADVANTAGES TO SHOOTING IN LIGHTROOM
Aside from being able to see a large version of the images you are shooting, there are some other really great advantages to shooting tethered in Adobe Lightroom.
You can create a library and automatically import your project images to it. I’m slightly obsessive with image organization, so the library feature is a huge plus for me.
You can also edit images on the spot to ensure proper exposure and lighting. And when you have edits made to one image, you can bulk copy the edits and corrections to the remaining images in the set to help cut down on editing time. You’ll more than likely need to go back in and tweak each image slightly, but for the most part it quickly edits all of your images at once.
Basically you can shoot, edit, and export all in one application which in my opinion, is all kinds of awesome and for me; it was a total game changer.
My Favorite Shots
I have a few photographs on MBA that have become my favorites over time. So much so that I’ve even had them printed in large canvas fashion, to hang on the walls of my kitchen and office. They inspire me every time I pass them.
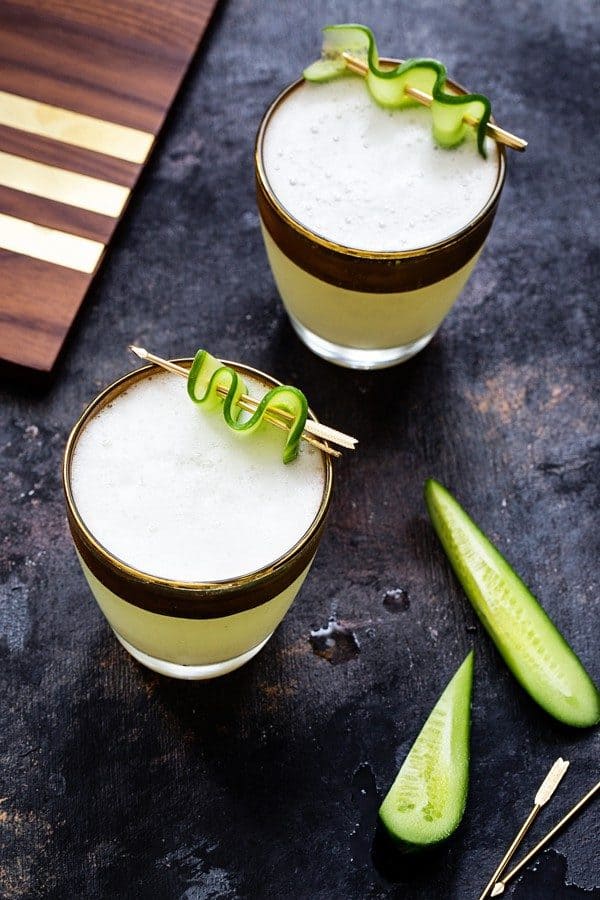
Most of them are cakes or cupcakes, but I’ll tell you, while we were shooting this gorgeous Cucumber Gin Fizz, I was struck by just how wonderfully light plays off of glass in photography. It can be a really wonderful place to start, if you’re working on understanding how light plays into your photography, to shoot cocktails or drinks.
This particular drink was especially fun to shoot because of the fun colors involved. Golds and greens play so well together. Have fun with your styling, like we did. Ribbons of cucumber are playful and add just the right amount of whimsy to a seriously good cocktail.
Have fun with your food photography. After all, that’s what this whole food blogging gig is about. People eat with their eyes first.
Cucumber Gin Fizz
Ingredients
- 2 ounces gin
- 1 ¼ ounce fresh lemon juice
- 1 large egg white or 1 ounce pasteurized liquid egg whites
- 1-2 ounces club soda
- ¾ ounce cucumber simple syrup
Cucumber Simple Syrup
- 1 cup water
- 1 cup granulated sugar
- ⅓ English cucumber washed and sliced, plus more for garnish
Instructions
Cucumber Gin Fizz
- Fill a cocktail shaker with ice.
- Add gin, lemon juice, egg white, and cucumber simple syrup (recipe below) to the shaker.
- Shake rhythmically for 15 seconds or until shaker is chilled.
- Strain into a cocktail or high ball glass.
- Garnish with cucumber and serve.
Cucumber Simple Syrup
- Add water, sugar, and cucumber to a small sauce pan.
- Bring mixture to a simmer over medium/high heat, stirring to completely dissolve sugar.
- Remove from heat and allow to cool.
- Remove cucumber slices and store syrup in the refrigerator.
Nutrition
Nutrition information is automatically calculated, so should only be used as an approximation.





The presentation of this cocktail is gorgeous! I love your ingredients, such a fun idea!!
Thank you so much, Eden!
Your photos turn out so great every time! And this drink is such a fun idea!
Thank you so much, Miranda!
I love seeing other photographer’s set ups, particularly when it comes to lighting. This is SO helpful — your photos are always gorgeous!!
Thank you as always, Kristan! xxoo
I keep meaning to shoot tethered, but I never do. I feel like I learned a lot the few times I got to help out at the WFM photo studio and be the reflector jockey – it definitely streamlined my process and convinced me taking 50+ photos for one post was silly.
Lightroom all the way!
I’ll admit, I’m very much a Photoshop girl, but everyone keeps telling me I have to try lightroom. I love your tips on shooting tethered. I’ve always heard it’s amazing, but have yet to try it. Also, dranks. This one looks gorgeous! I love the cucumber flourish.
Shooting tethered is a total game-changer, Amber – do it! Thanks so much for stopping by!
-Jamie
I have always admired your photography, and now you’re making me rethink my whole setup! I hate shooting with a tripod, I don’t shoot tethered, and I don’t use natural light. Ha. I also use Photoshop instead of Lightroom, because Lightroom seems so much more confusing. I need to rethink my game here! :)
Thanks for sharing your process. This was awesome!
You’re sweet, Karly! I love your photography, so you’re definitely doing it right!
I LOVE that you posted pictures of your set up! I am always thinking of new ways to set up my shots! I started using Lightroom a few years ago and have never looked back!
I love set-up shots too, Shelly! It’s always so interesting to see how people set up and style their photos.