This post may contain affiliate links. Please read our privacy policy.
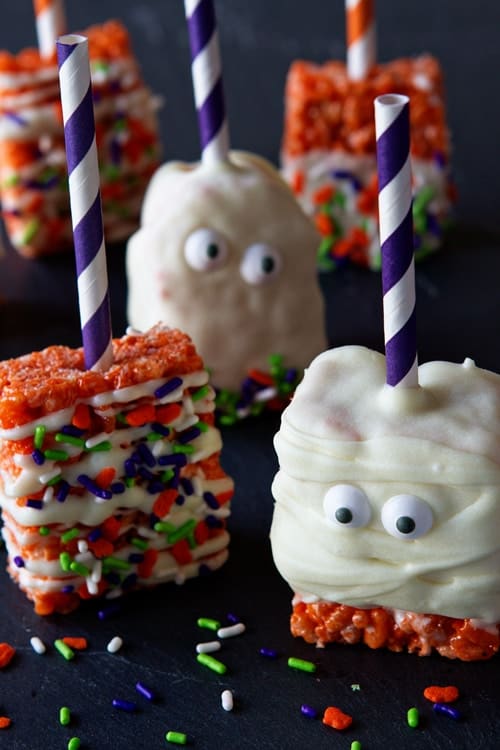
Marshmallow treats are given a Halloween twist and served on paper straws to create a sweet and festive dessert worthy of any Halloween celebration.
I am most definitely a last minute person when it comes to holiday planning. Which is pretty ironic considering I’m a list-driven, over-planner in most other aspects of my life. Holiday shopping? You’ll find me online on December 20th paying for overnight shipping, so I’ll have time to wrap everything in cute paper and coordinating bows.
Holiday food? Yep, I’ll be making that last minute too – you’ll find me prepping Thanksgiving stuffing at 2am, then pleading with Eric to run to the 24-hour Kroger to get butter because I thought I had 5 pounds in the freezer. Fueled by coffee and deviled eggs, (which are a holiday must) I always manage to pull off pretty epic meals.
Halloween is no different. This past weekend, my dad and stepmom hosted an amazing Trick-or-Treat party. Which was even more special because it was Elle’s very first Halloween. Even though my stepmom continuously stated, it’s not a party, it’s just trick-or-treat – a party it most definitely was. She planned a delicious spread complete with punch with floating eyeballs, meringue bone cookies, crockpot pulled pork and that’s just naming a few items. Of course, I volunteered to bring a dessert – shocking, right?
Between prepping our little cupcake’s Halloween costume, blogging deadlines and the other random 200 things we had going on, I totally forgot that I needed to make a dessert for the “not a party.” While most people can get away with store-bought cookies or cupcakes, this baking blogger most certainly cannot, so I scoured the kitchen and decided to whip up Halloween Marshmallow Treats.
As you may remember from my Ambrosia Salad post, I’m partnering with Emily from Jelly Toast and Campfire® Marshmallows. You’ll see more recipes from us, and hopefully even more exciting stuff during the holiday season.
Be sure to check out Emily’s post for Ghost Marshmallow Treats – they’re pretty darn spooktacular!
We even created a Marshmallow Madness Pin Board where we’ll pinning loads of delicious marshmallow recipes from our favorite food sites.
For more information about Campfire® Marshmallows, find them on them on Facebook and Twitter.
Halloween Marshmallow Treats
Ingredients
- 4 tablespoons unsalted butter
- 10 ounces Campfire® Hallow Mallows about 30 Hallow Mallows
- ½ teaspoon pure vanilla extract
- 6 cups crisped rice cereal
- 1 ½ cups Campfire® Mini Marshmallows
- For Decorating
- paper straws cut in half
- white candy melts
- googly candy eyes
- sprinkles
Instructions
- 1. Line a 9 x 13 x 2 inch baking pan with foil. Butter the foil or spray with nonstick cooking spray.
- 2. In large saucepan, melt butter over low heat. Add in Campfire® Hallow Mallows and stir until completely melted. Remove from heat and stir in vanilla extract.
- 3. Add crisped rice cereal stirring until well coated. Stir in Campfire® Mini Marshmallows
- 4. Using a buttered spatula, press the mixture into the prepared pan. Cool. Cut into squares.
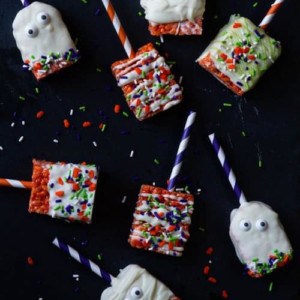
- 5. If desired, cut cooled marshmallow treat into small squares, place squares on a paper straws and decorate as desired.
Notes
Nutrition
Nutrition information is automatically calculated, so should only be used as an approximation.
You may also like
Disclosure: My Baking Addiction has teamed up with Campfire® marshmallows to share recipes using their products. This is a sponsored post written as part of that program. All opinions about Campfire® marshmallows are 100% my own.


These are such an adorable last minute “not a party” dessert! I hope you had a great first trick or treat!
Sarah-
Thanks so much for visiting!
-Jamie
What a fun treat for the kids!
Lori-
Thanks for stopping by!
-Jamie
Mmmm…. Now I want rice crispie treats! I will definitely be making these for work next year.
Julia-
Thanks so much for stopping by.
-Jamie
These are such a cute idea! I absolutely love them, they are colorful and fun for Halloween! The mummies look goofy and dorky in a cute way.
Rochelle-
Thanks so much for visiting!
-Jamie
These are adorable! As a fellow holiday procrastinator, I will be attempting these tomorrow for a friend’s Halloween party. I am new at this (at baking and to your blog). Could you tell me a little more about decorating these? Did you dip them in the melts? How did you create those mummy wraps? How did you set them up to dry? Any help would be appreciated, thanks!!
Janet-
I spooned the melts over them instead of dipping them. For the mummies, I coated them in a layer of melts, let it set up and then went back over them again with an additional drizzle of melts. I let them set up on wax paper. I hope this helps.
-Jamie
Awesome! Thanks!!!
So much cuteness! I love the little mummies. My kids would go nuts over these!
Lindsey-
They are perfect for kids. Thanks so much for visiting!
-Jamie
Just wanted you to know that I am always looking forward to your emails. So many clever and delicious articles to test. Thanks for being here.
Judy-
I’m so glad you are enjoying the the emails. Thanks for visiting.
-Jamie